In August, Ames and I did something we never thought we’d do – we finally bought a move-in-ready home. Since our first house renovation project in 2005, we’ve gutted kitchens, updated bathrooms, replaced fixtures, tiled, and even added on to the neglected homes we’ve purchased.
While our new place is amazing, there’s one DIY project we’ve been talking about since our first walk-through. The house has a large formal dining room with 12′ ceilings, high windows, and a beautiful modern chandelier, making it a blank canvas of a space. Here’s the listing photo:
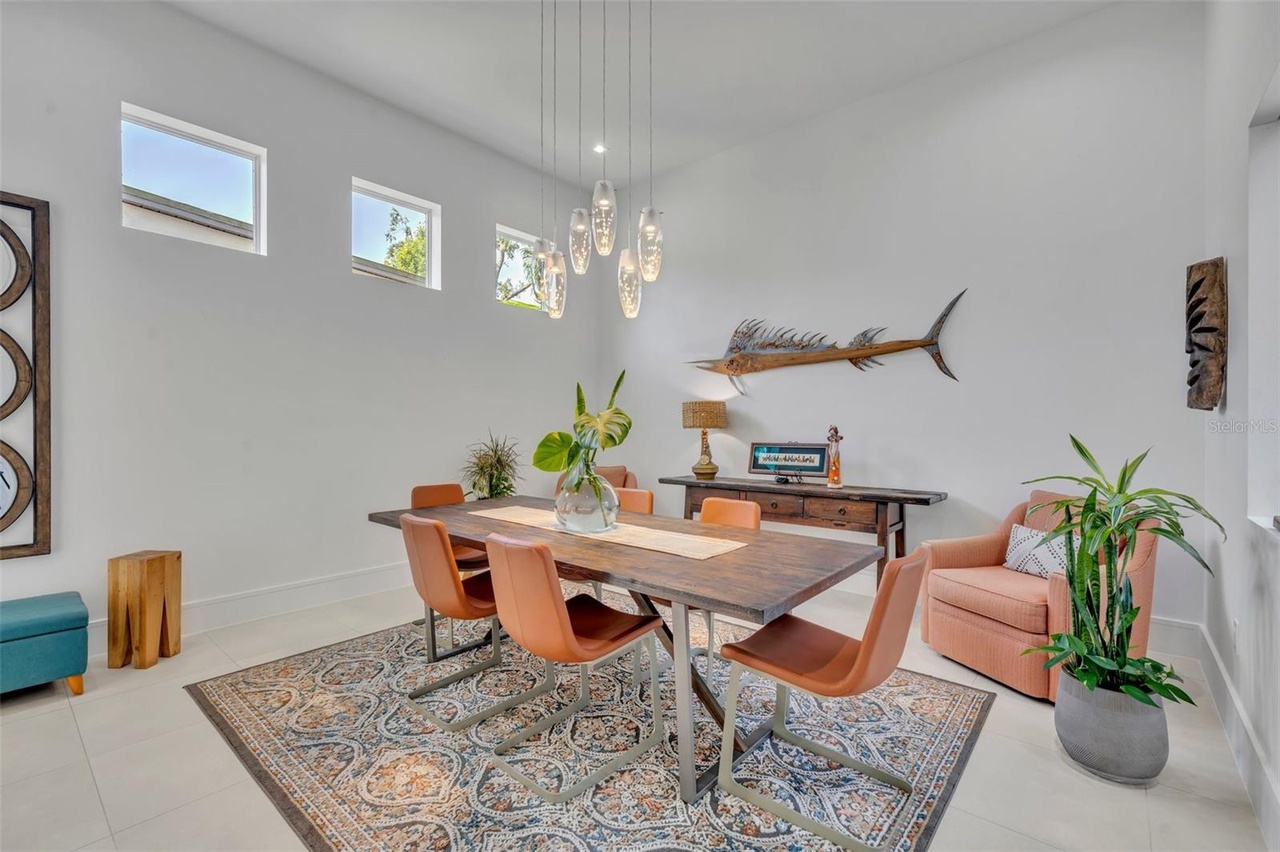
There’s plenty of space between the kitchen and living room for a table already, so we didn’t need a dedicated dining room. What we wanted was a warm, inviting den for reading, homework, and board games.
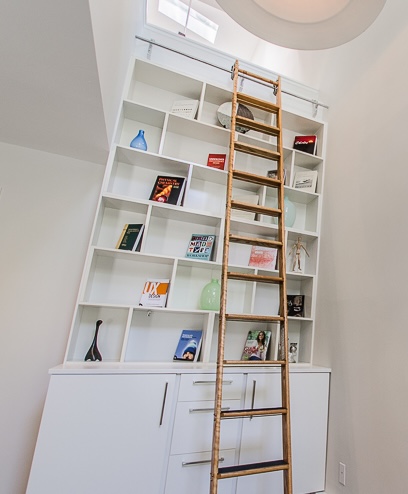
When we saw that tall, blank wall – the one with the wooden fish in the listing photo above – we immediately thought about the built-in shelves and the rolling library ladder we installed in a loft space at our house in Decatur, Georgia (AKA, The Pulley House). I wanted a similar rolling ladder for the den, and I knew the shelf design would hinge on the ladder rail placement. Before planning anything else, I started searching for a 10′ ladder that would work with the space. All the new library ladders (and most of the used ones I could find) were very expensive, so I set up some alerts on Facebook Marketplace. I ended up finding an old Putnam rolling wood ladder for $100, including the rail. It made my Xennial heart happy that the ladder had a manufacturer date stamp of 1980 and came from the stockroom of a store in the old Lake Square Mall in Leesburg.
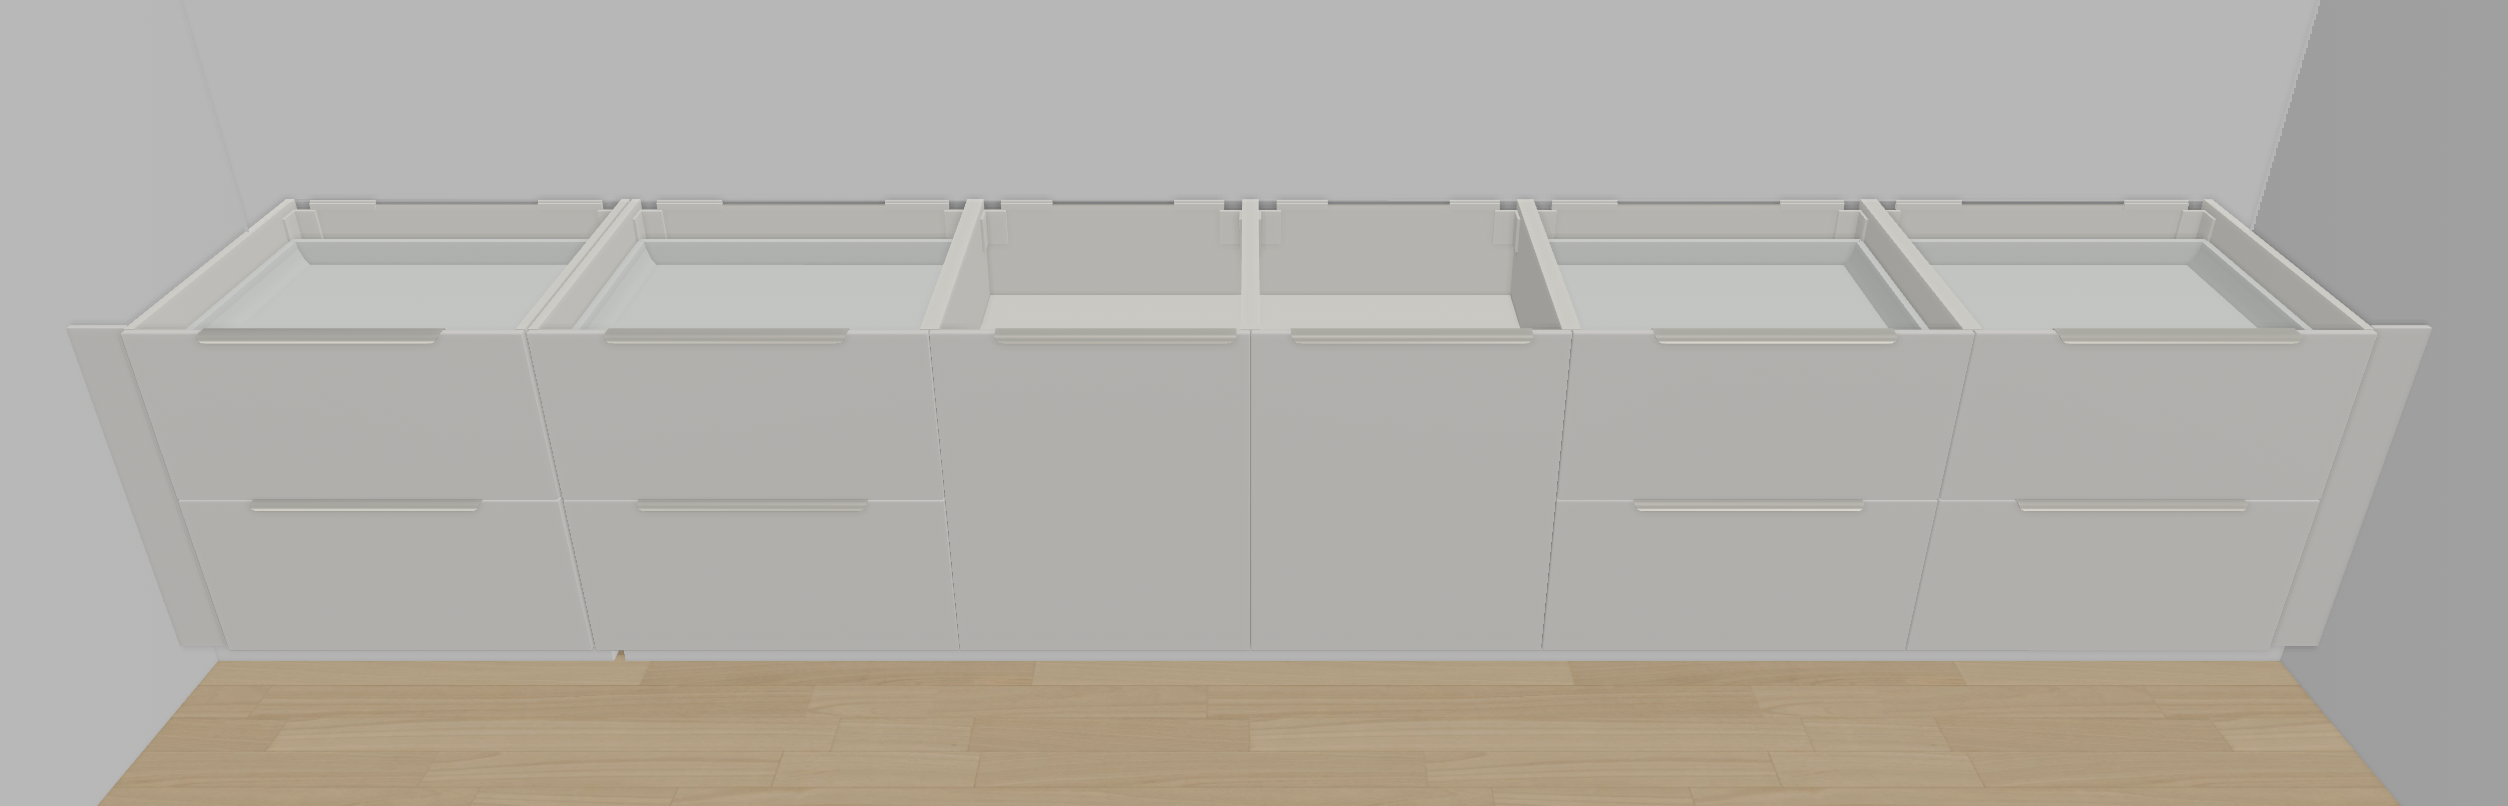
With a ladder acquired, Ames and I started thinking about the design of the built-in. We wanted some practical, hidden storage, so we decided to go with IKEA kitchen base cabinets at the bottom. After experimenting a bit in the kitchen planner tool, we found that a set of 24″ wide cabinets flanked by 30″ drawer units was the best use of the room width.

For the countertops, we considered engineered quartz to match the kitchen, but thought butcher block would look better in the room when paired with the wooden ladder. We first looked at IKEA’s Vrena countertop, but learned that all of IKEA’s butcher block countertops are now just veneer over MDF. For the exact same price as the Vrena, we chose a solid-wood Acacia Butcher Block from Floor & Decor.
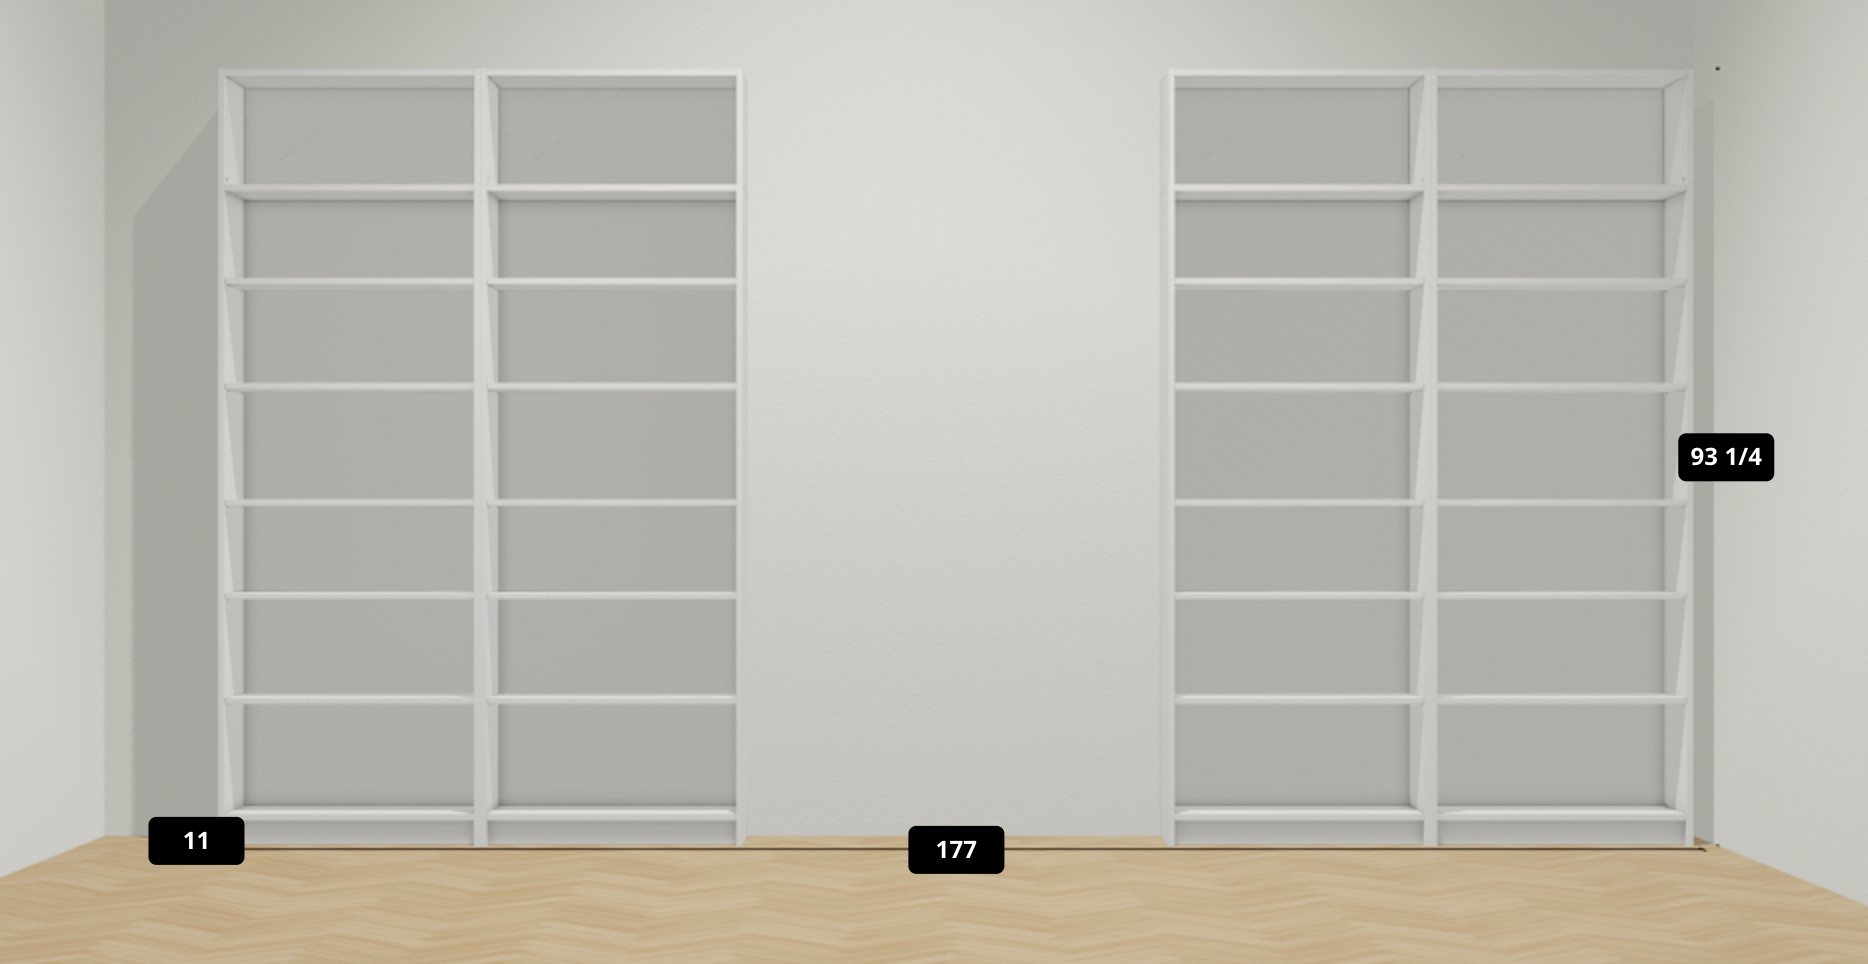
The next step was the bookshelves. We needed at least 7′ of height to give us something to attach the ladder rail brackets to. Initially, we planned to fill the wall with shelving, but didn’t want to build them from scratch, and the width of the options we found left a lot of wasted space on either side. We simplified the plan to use just 2 columns of bookshelves, leaving space in the middle for a small TV. Two sets of the standard, 31.5″ wide Billy bookcases with a height extension ended up working great.
That was as far as we planned before deciding to take on all of this over our winter “break” and pulling the trigger on both the Floor & Decor and IKEA orders. I picked up the countertops myself, and we had the IKEA order delivered for $59. IKEA’s delivery options have drastically improved over the last couple of years, and for that price, it was a scheduled delivery to the room. Having hauled home many kitchen cabinet orders from IKEA over the years, that was sixty bucks well-spent.

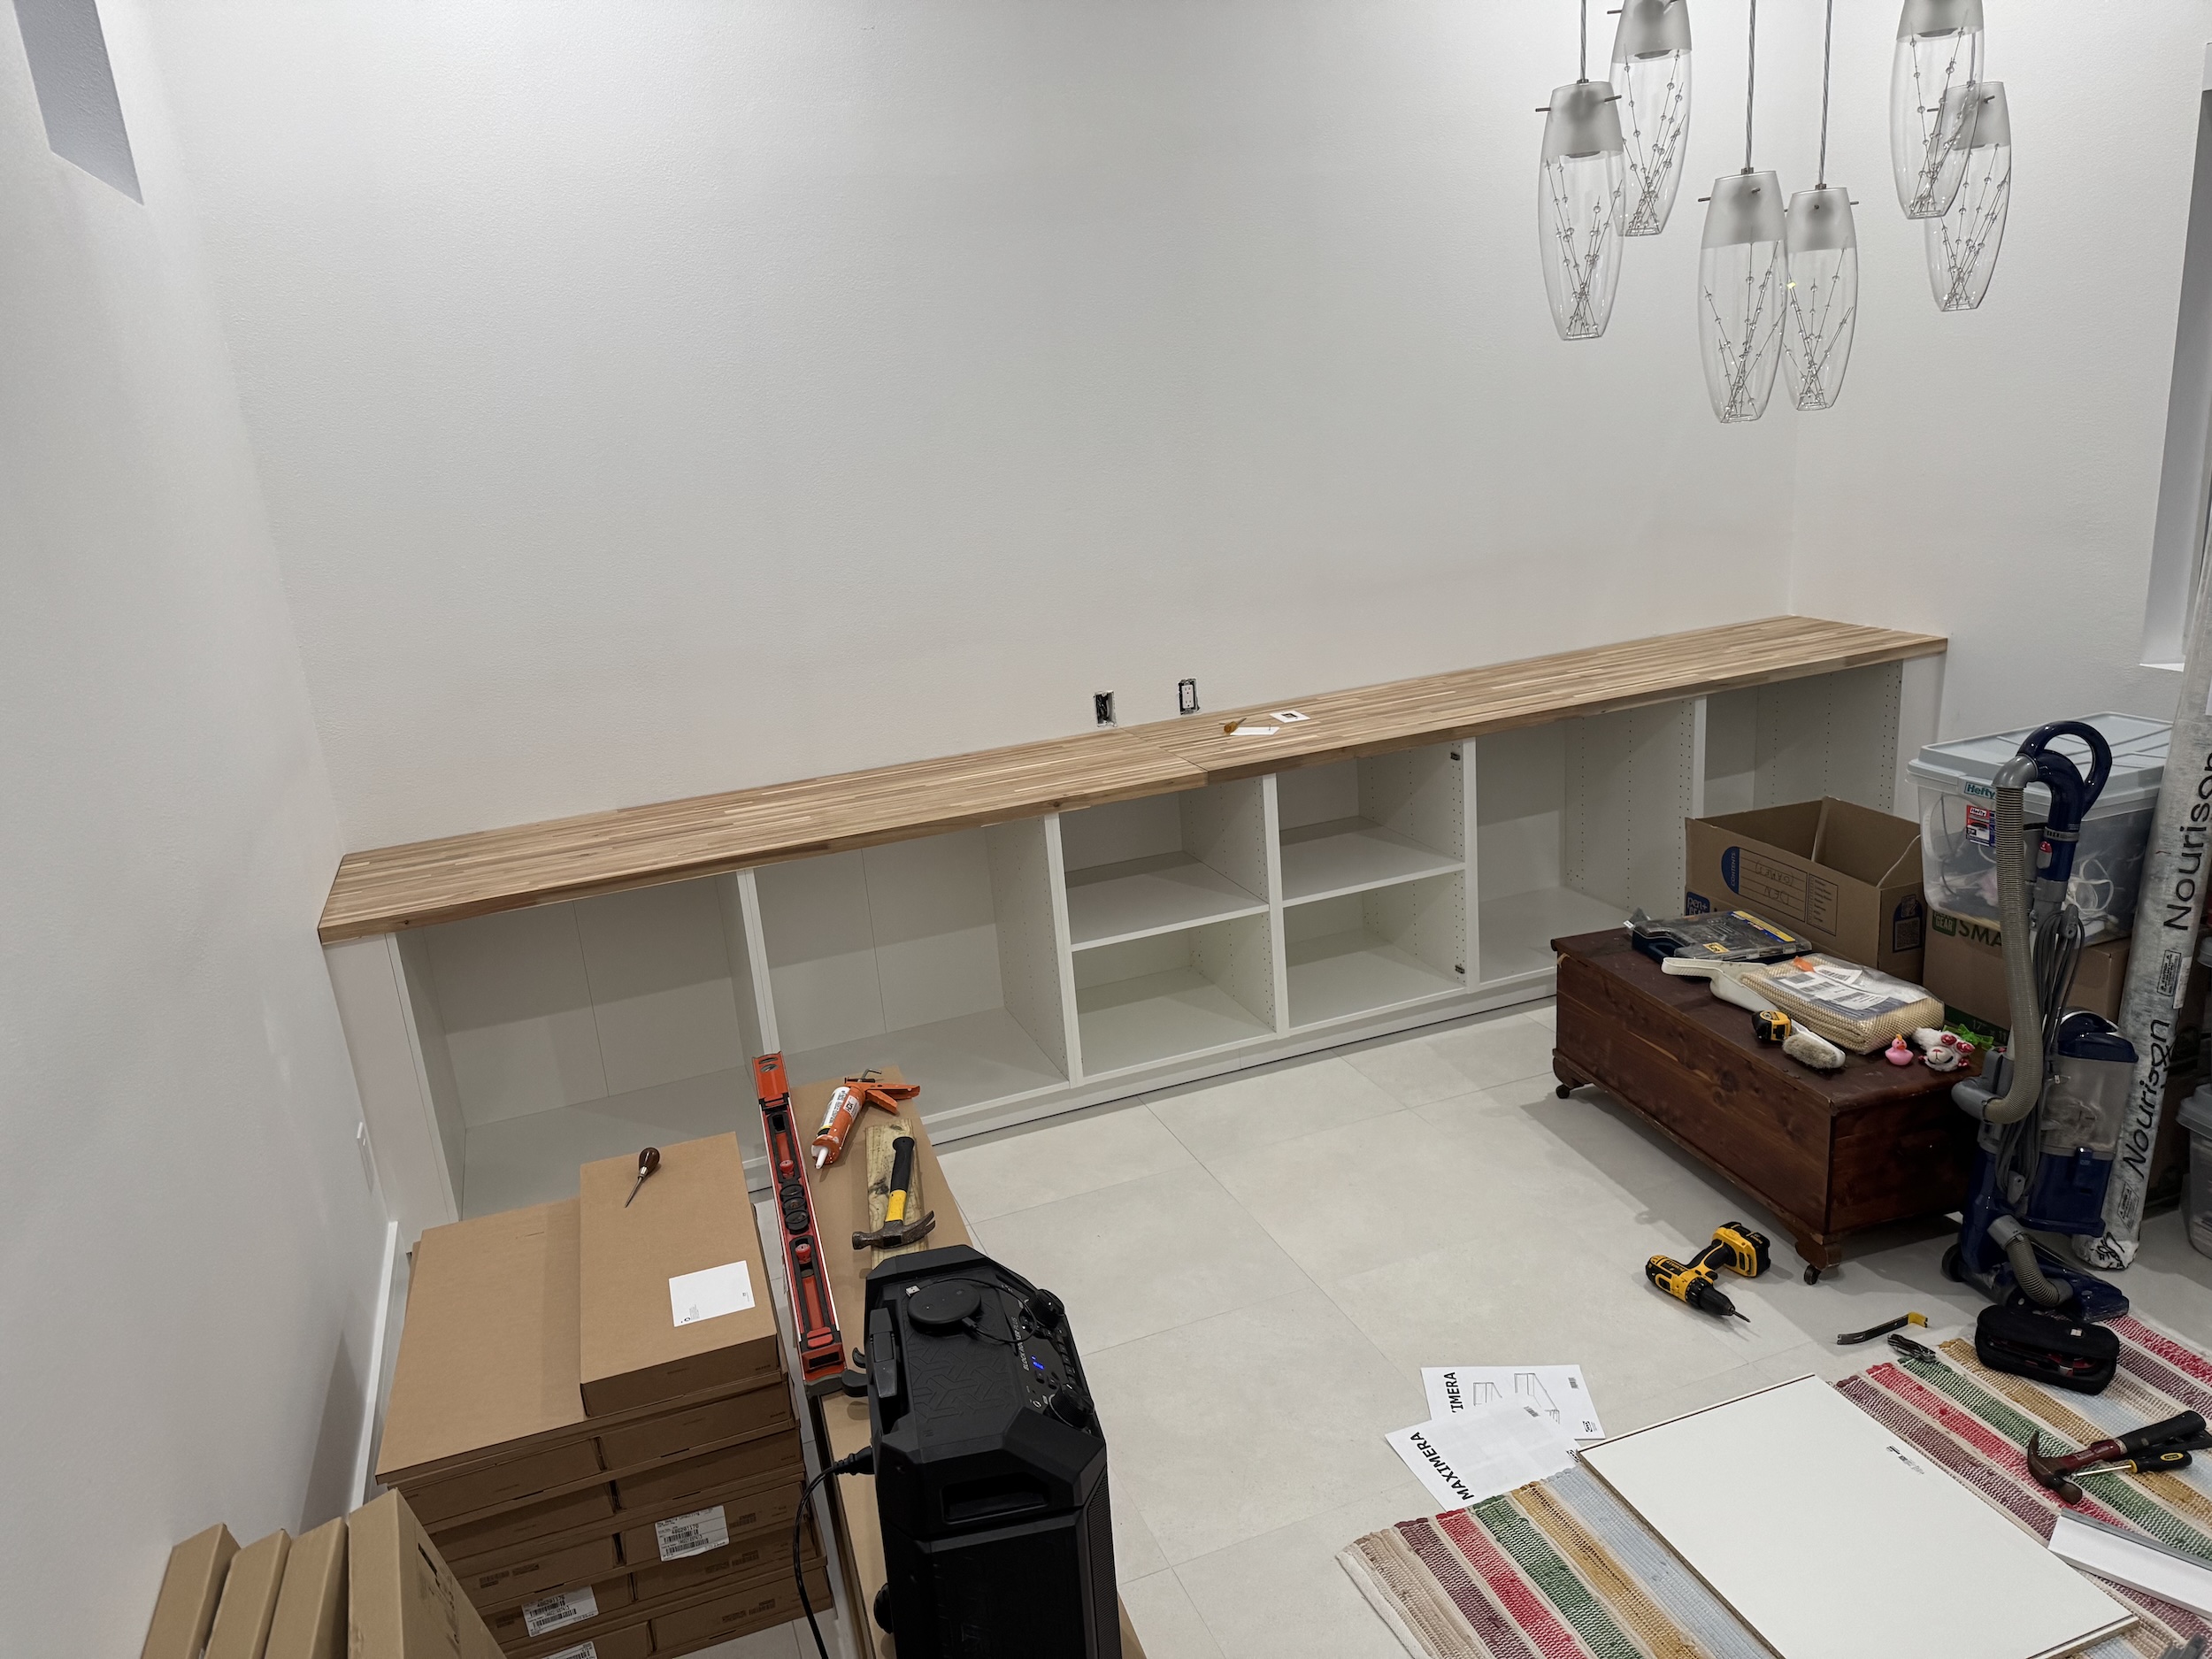
We started assembling cabinets at the start of Christmas week and had the entire base unit (including drawer hardware and doors) finished before Santa arrived. Even though we don’t plan to prep food on the countertop, we decided to keep it food-safe and finish it with mineral oil, which really brought out the wood’s vibrant colors.
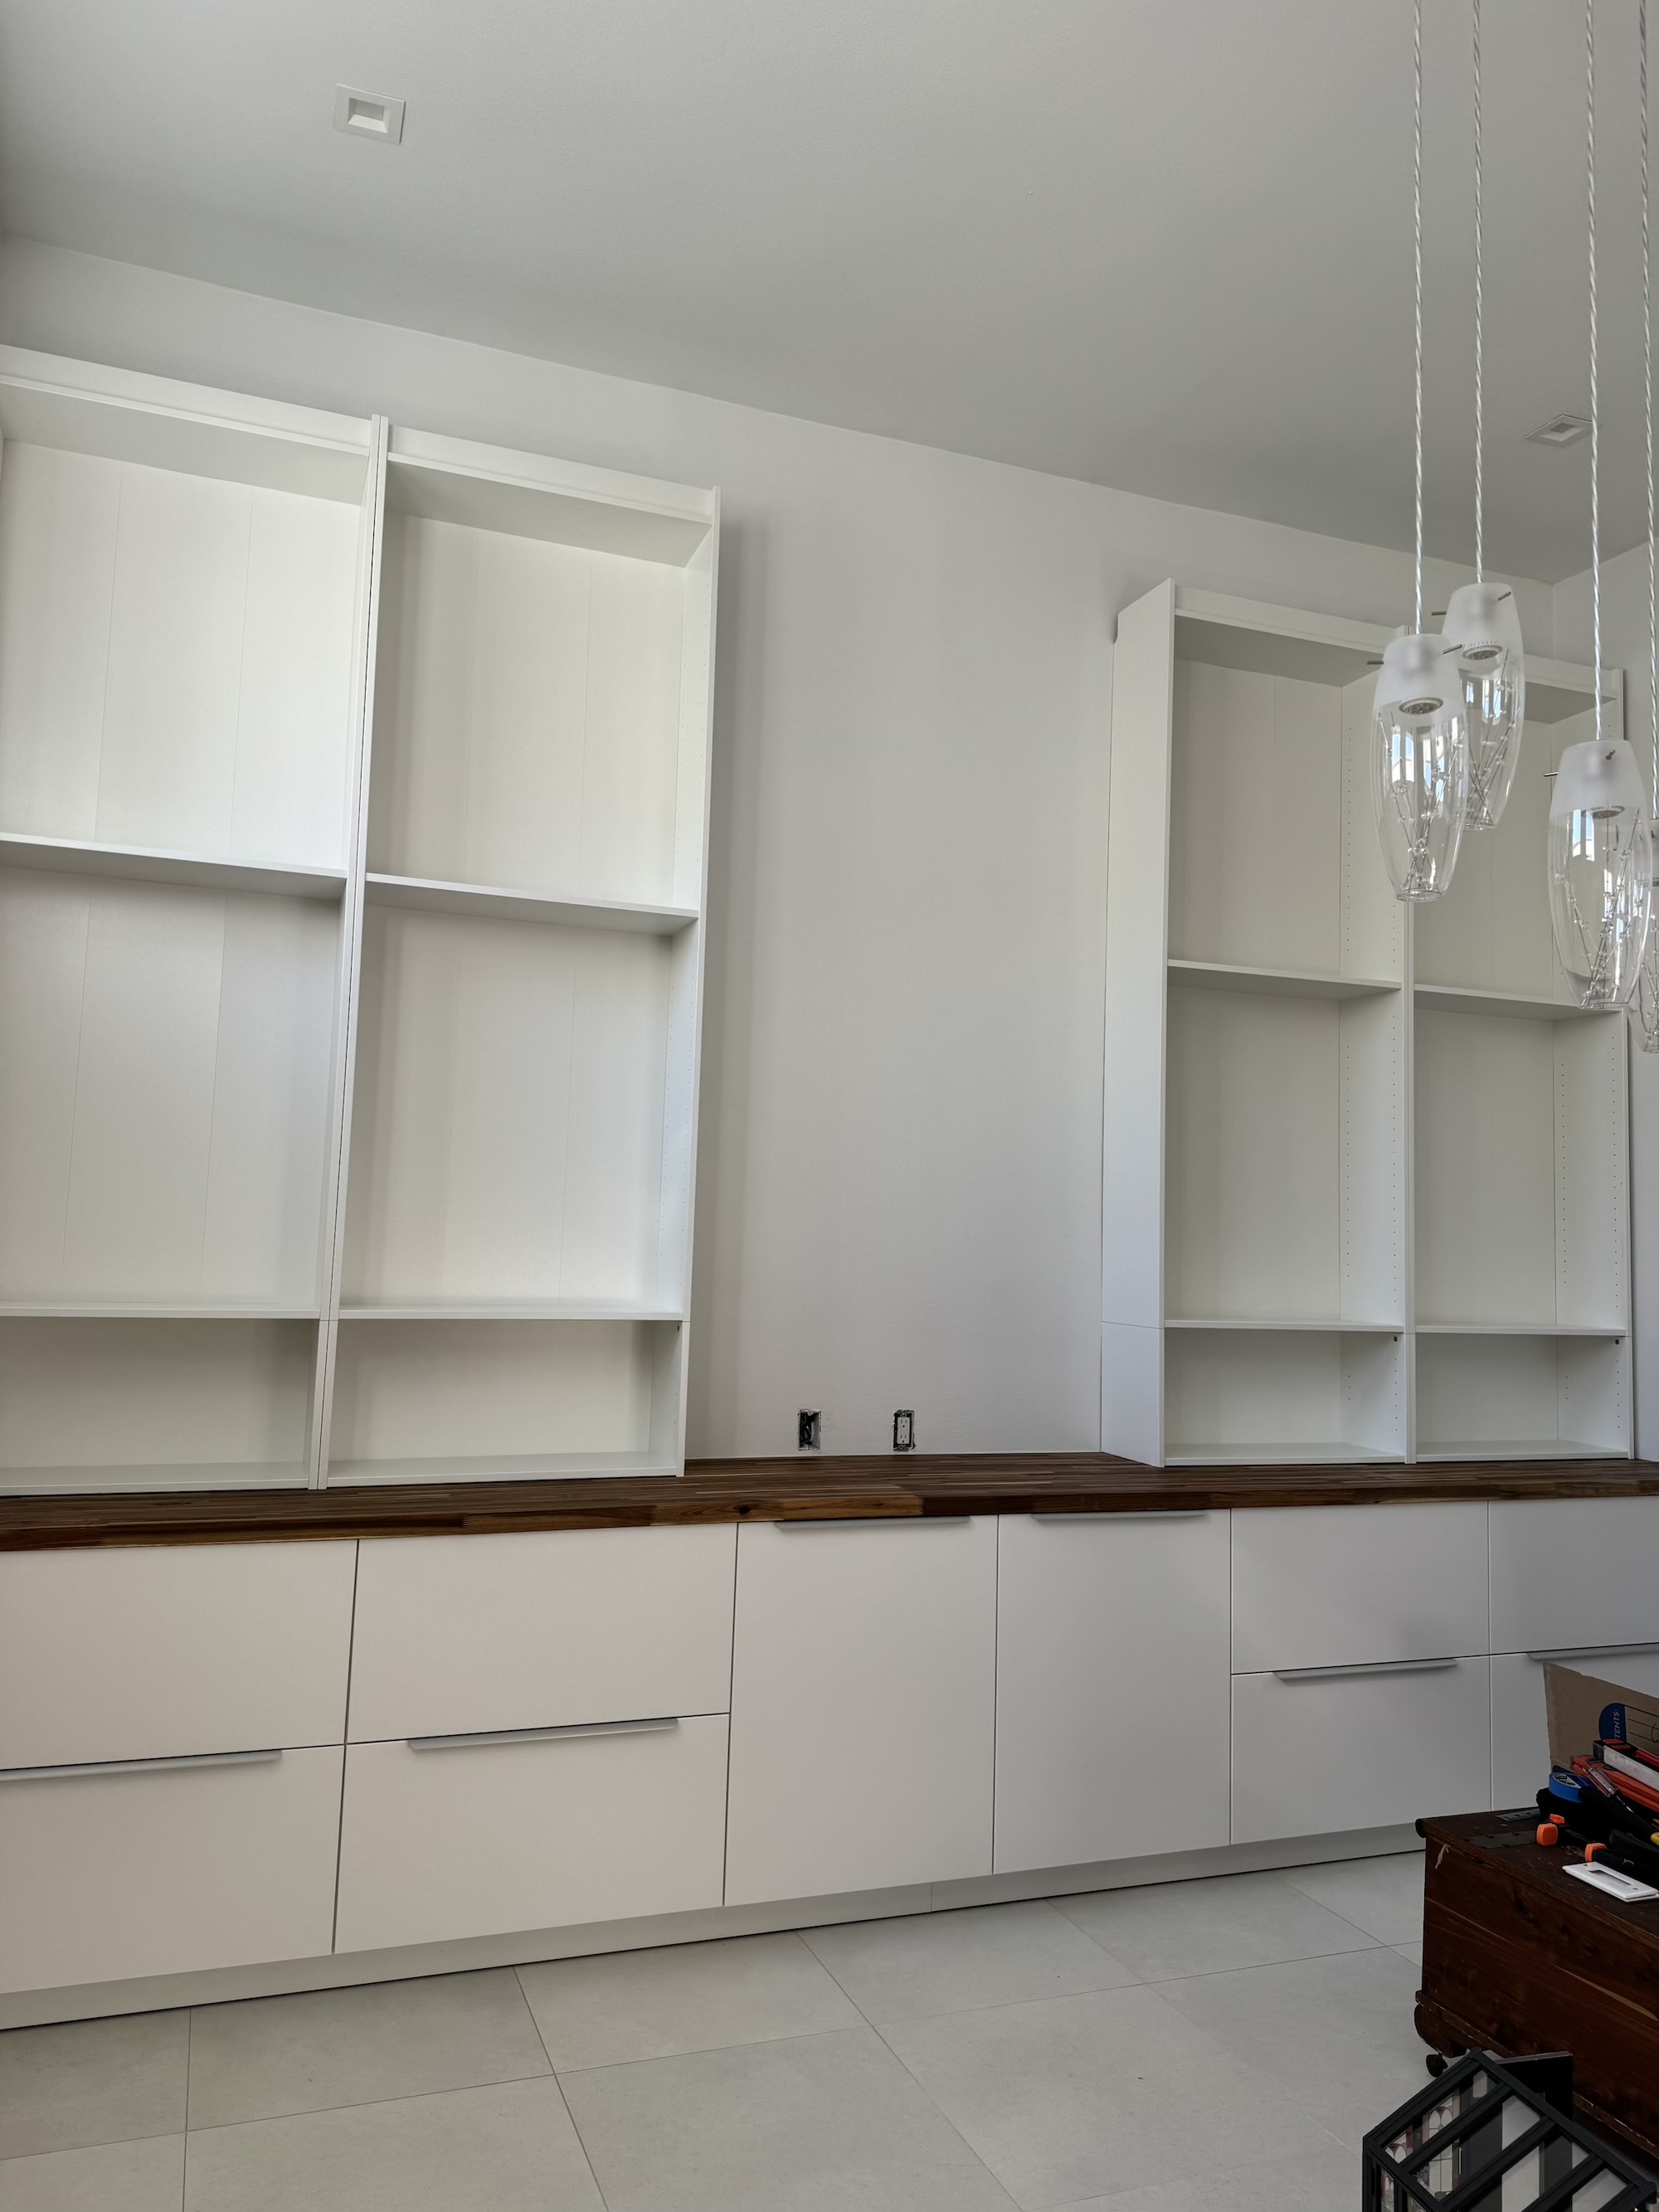
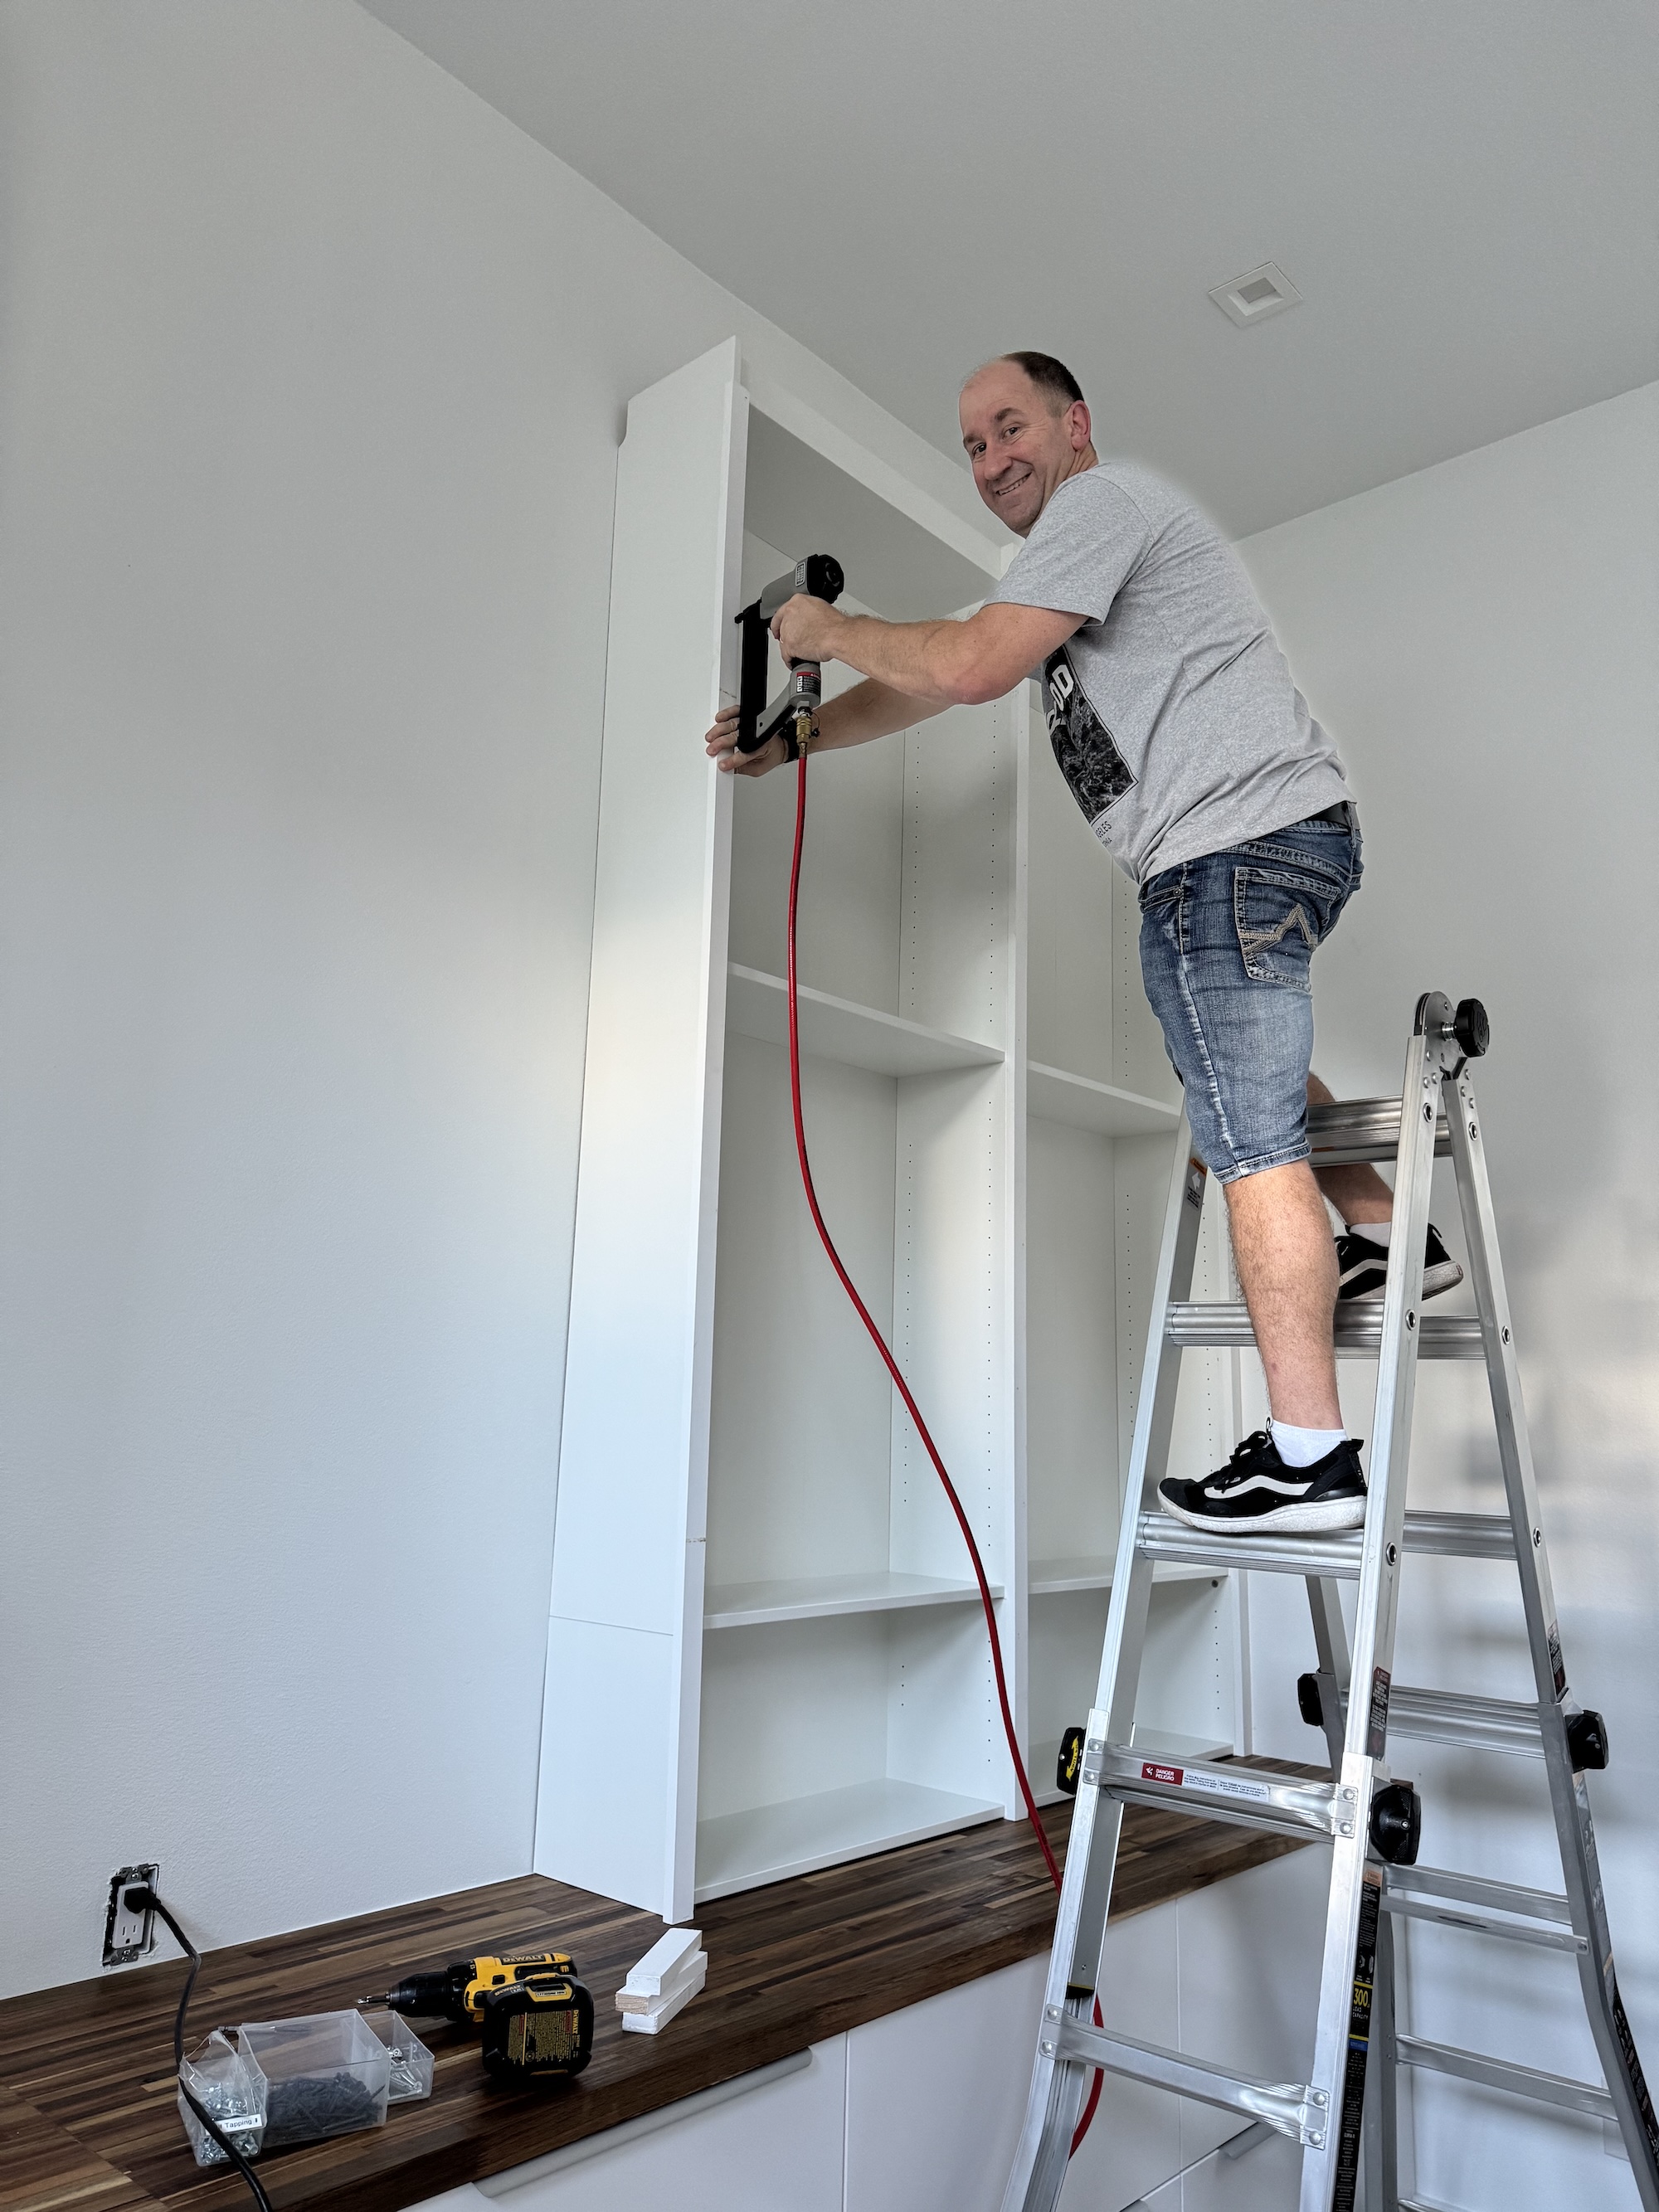
A couple of days after Christmas, we got started again on the bookcases, and Amy discovered a genius hack – flipping the Billys upside down. We didn’t like the 3+ inches of footer on top of the countertop, so we assembled the bookcases with top extension as usual, but turned each unit over. To make it look more built-in, we installed strips of 1×2 trim over each vertical beam, and then a 4″ strip of trim across the top. Those covered up the joint where the cabinets butted together, giving a consistent width across the cabinet fronts.
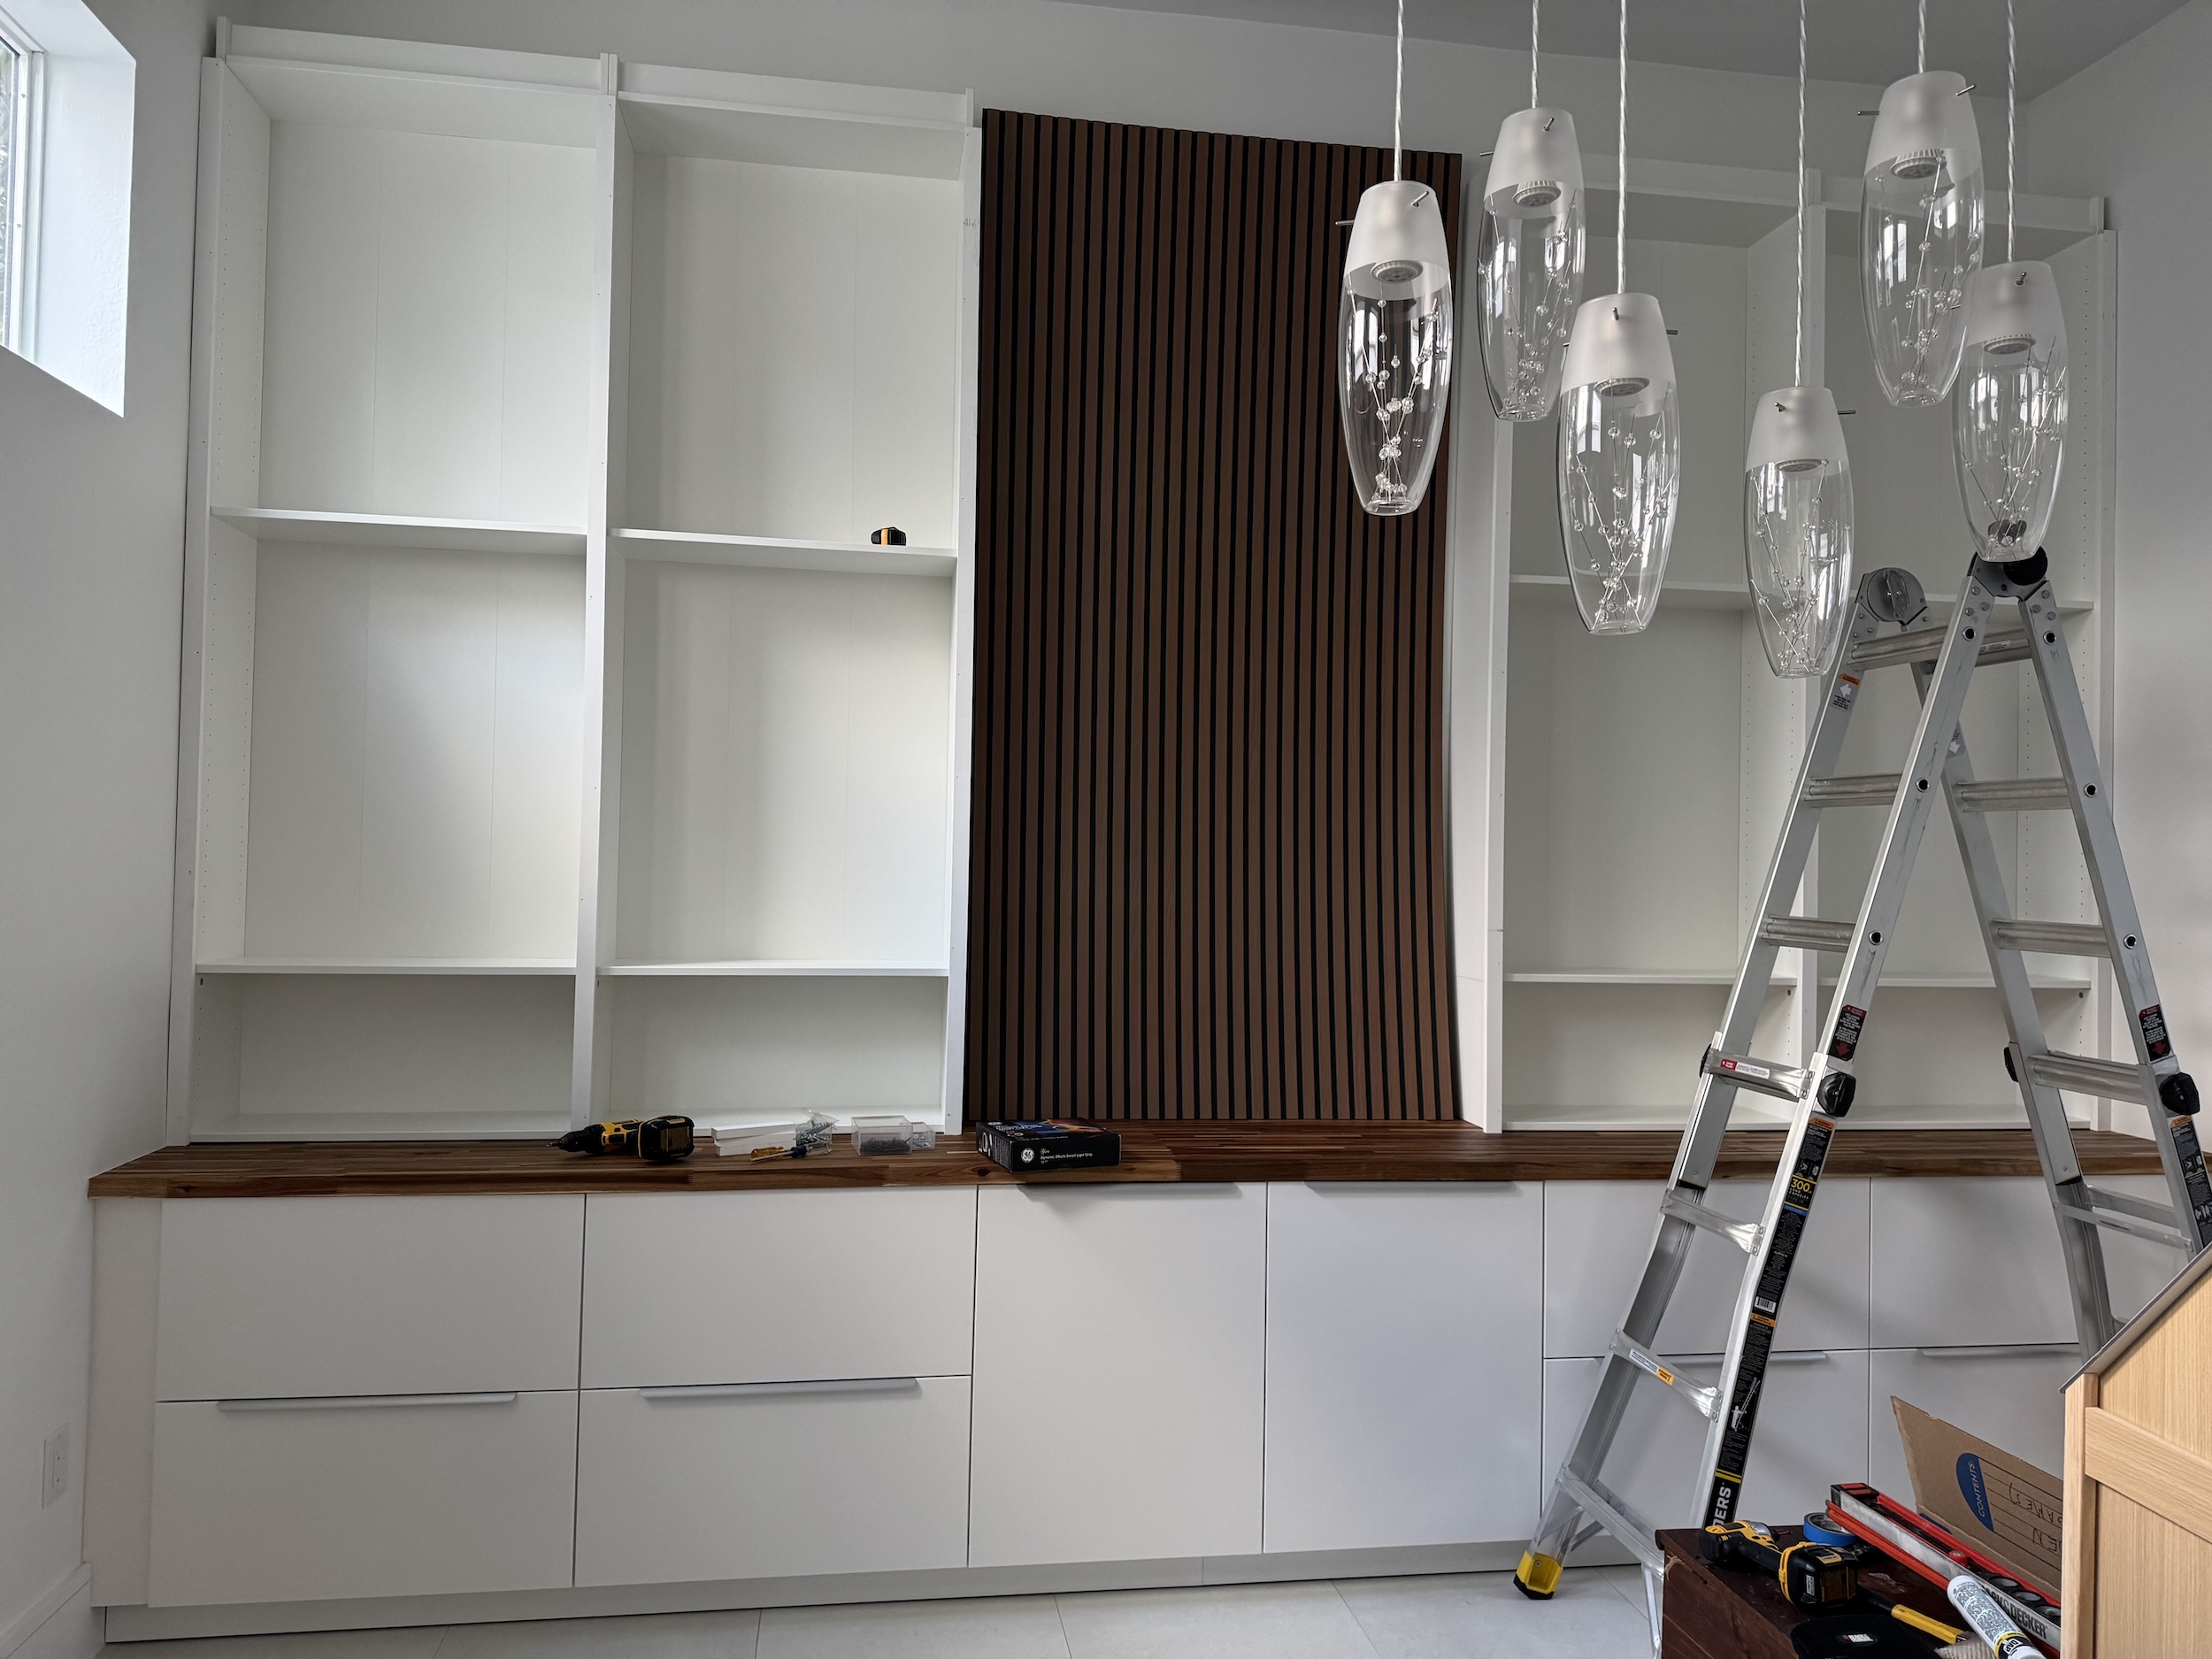
To make the ~4′ space between the shelves where the TV would be mounted a focal point and to hide the TV power cord, we wanted some kind of textured panel. Amy found a 4′ × 8′ oak slat wall panel from Home Depot that worked perfectly. We used 4 of the 1×2 strips attached to the wall studs as furring strips to support the panel. Here it is with the trimmed panel dropped in for a test fit.
Above the panel, we installed a decorative shelf to provide a continuous top for the built-in. That also offered a platform to nail the header trim against across the top. While I was working out the trim details, Amy was prepping the ladder. It was a bit of a mess, with 45 years of stockroom grease and grime. After a good scrub with hot water and Dawn, she applied a coat of Howard Feed-N-Wax. If you have any old wooden furniture, this stuff works magic. We had a partial bottle that we’d used on a coffee table a couple of months ago, and wow, did it make that old wooden ladder look like new.
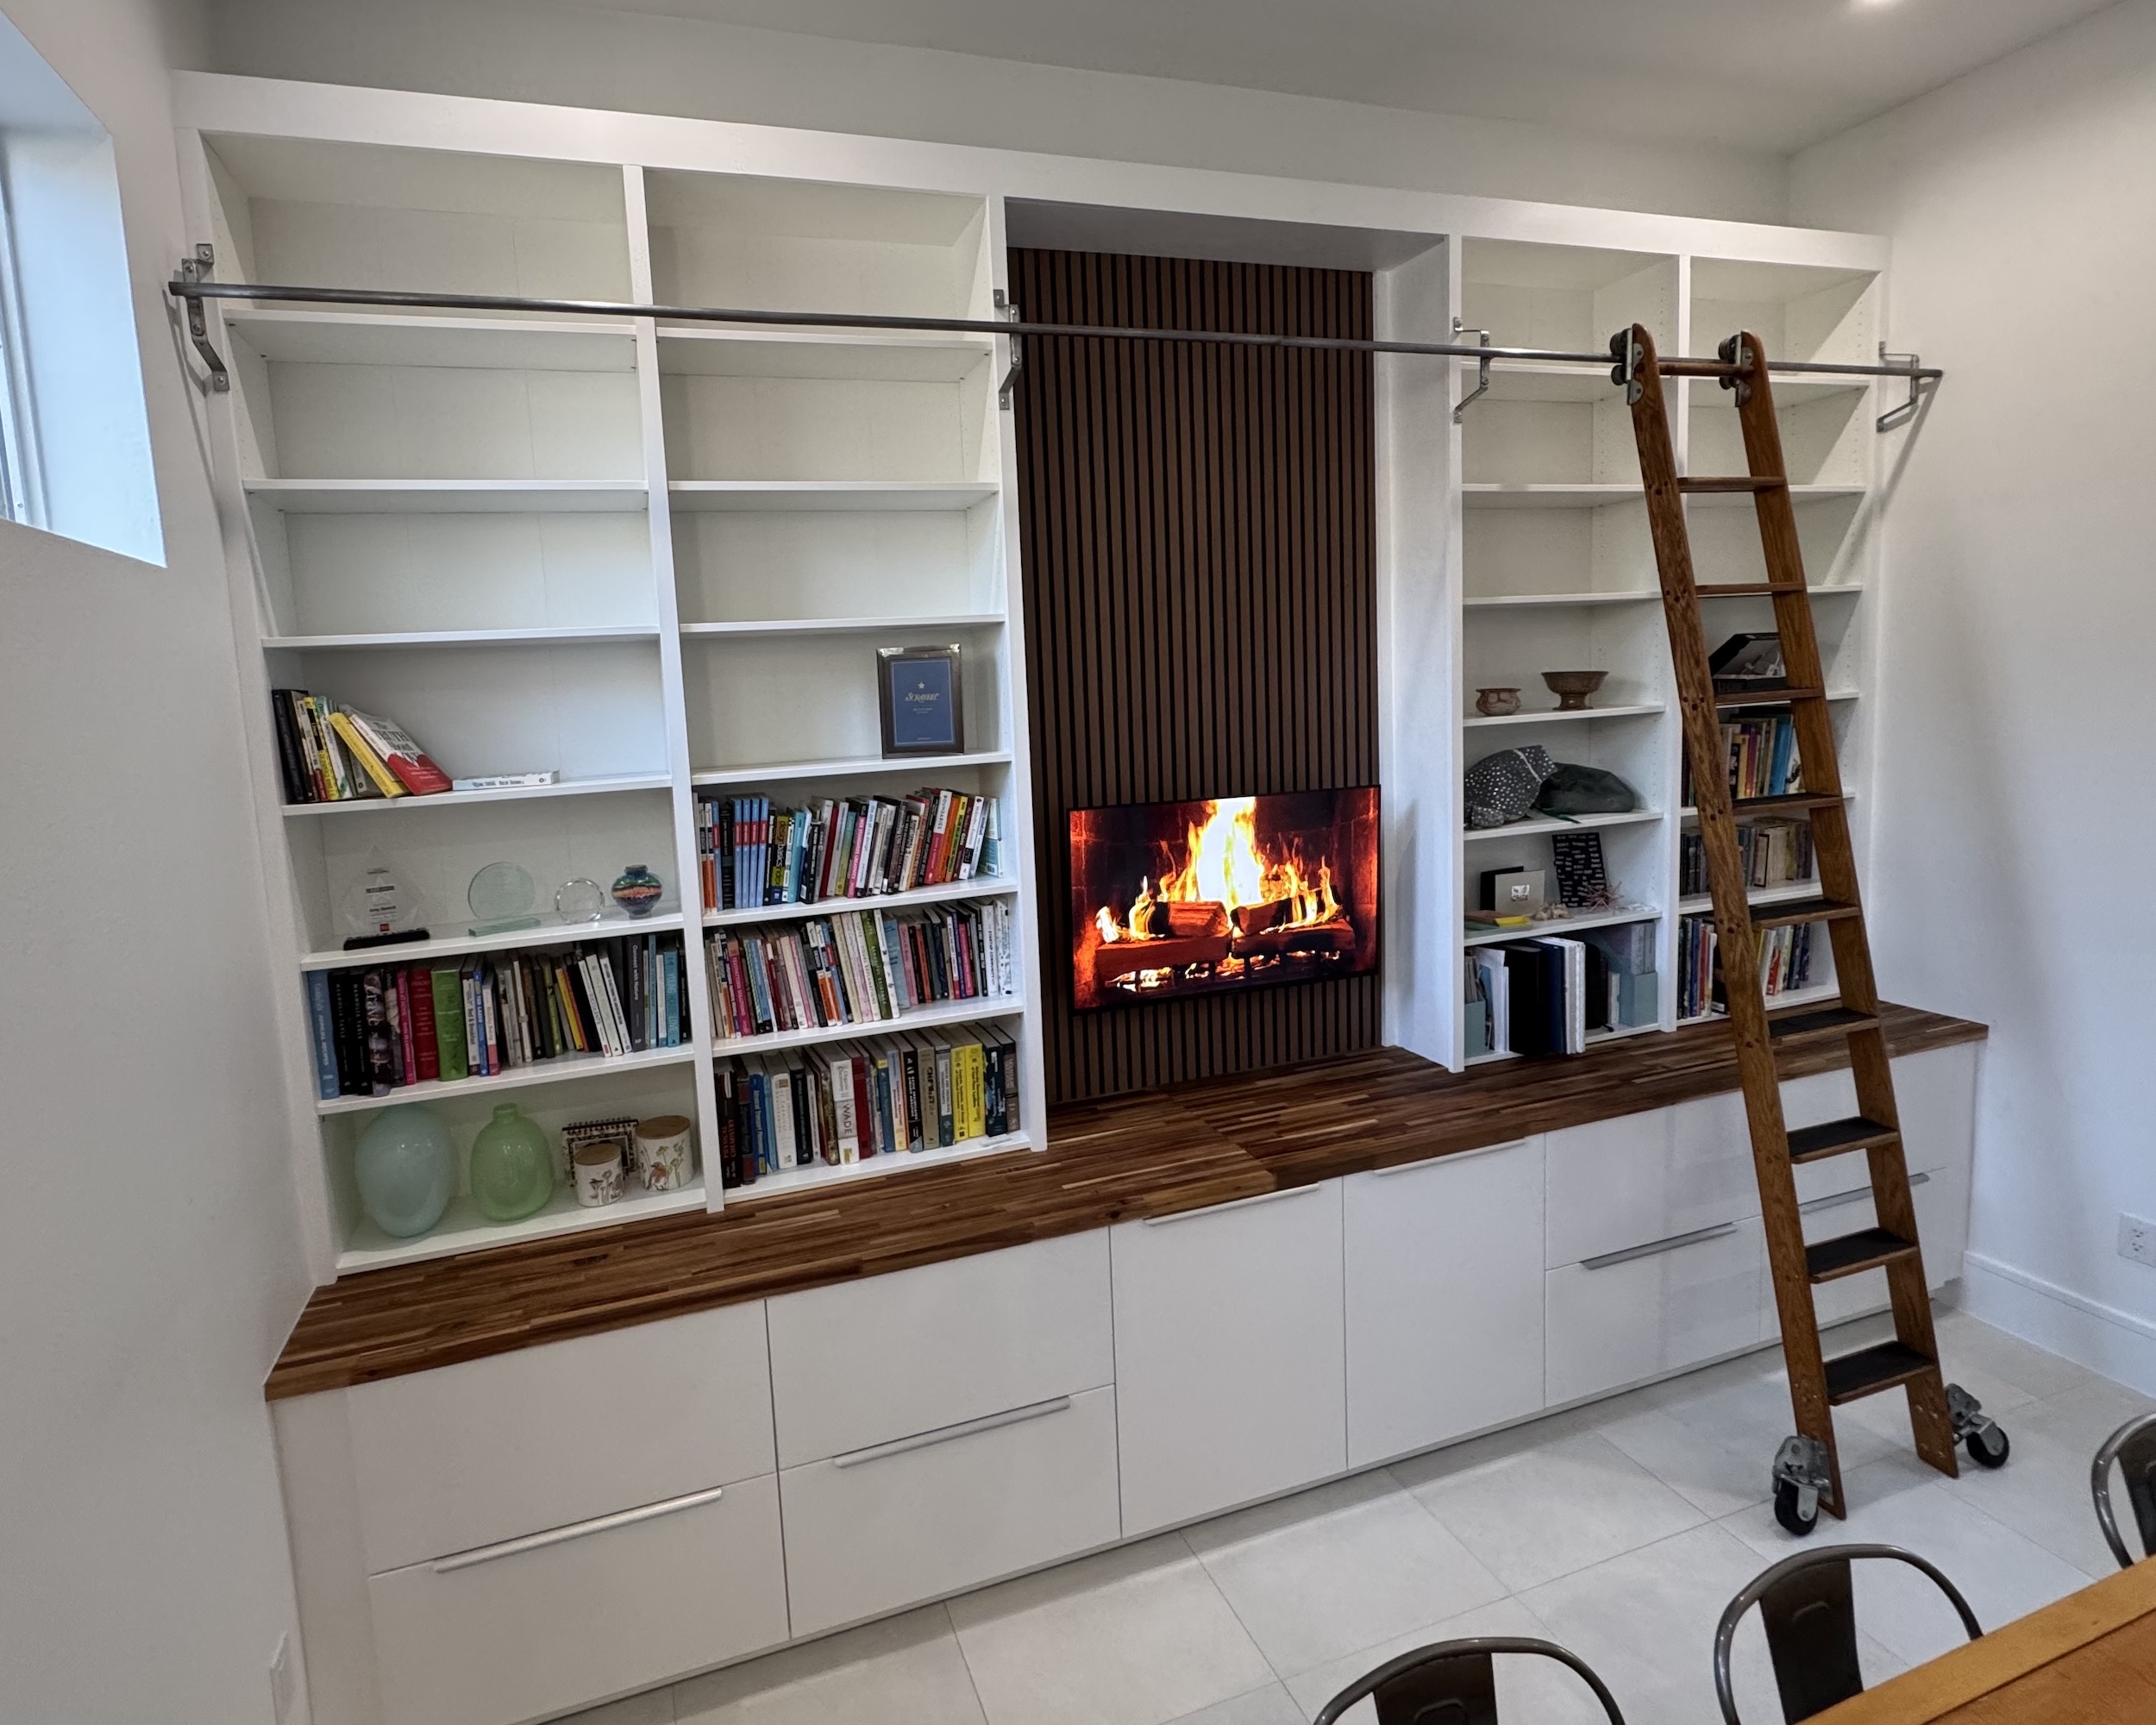
Sanding and polishing the tarnished, rusty metal rails made them look great, too! I had a couple ~8′ sections of rail from the old mall and a 14.75′ wide wall to cover, so I trimmed the rails to equal widths and hammered a 3/4″ hardwood dowel into the rail to join the two sections at the center. Getting a rail exactly the width of the room into the room and attaching it to the wall was a logistical challenge. First, I predrilled the top screw holes in each of the 4 mounting brackets into the cabinets. Then, with the brackets and detached ladder rollers hung on the rail, Amy and I carefully parallel parked it through the door and into the den with Mavrie helping out as a spotter. Finally, Amy used a broom to lift one side into position, while I screwed in the other from our folding ladder. It wasn’t an elegant process, but we all let out a cheer once it was safely attached to the wall.
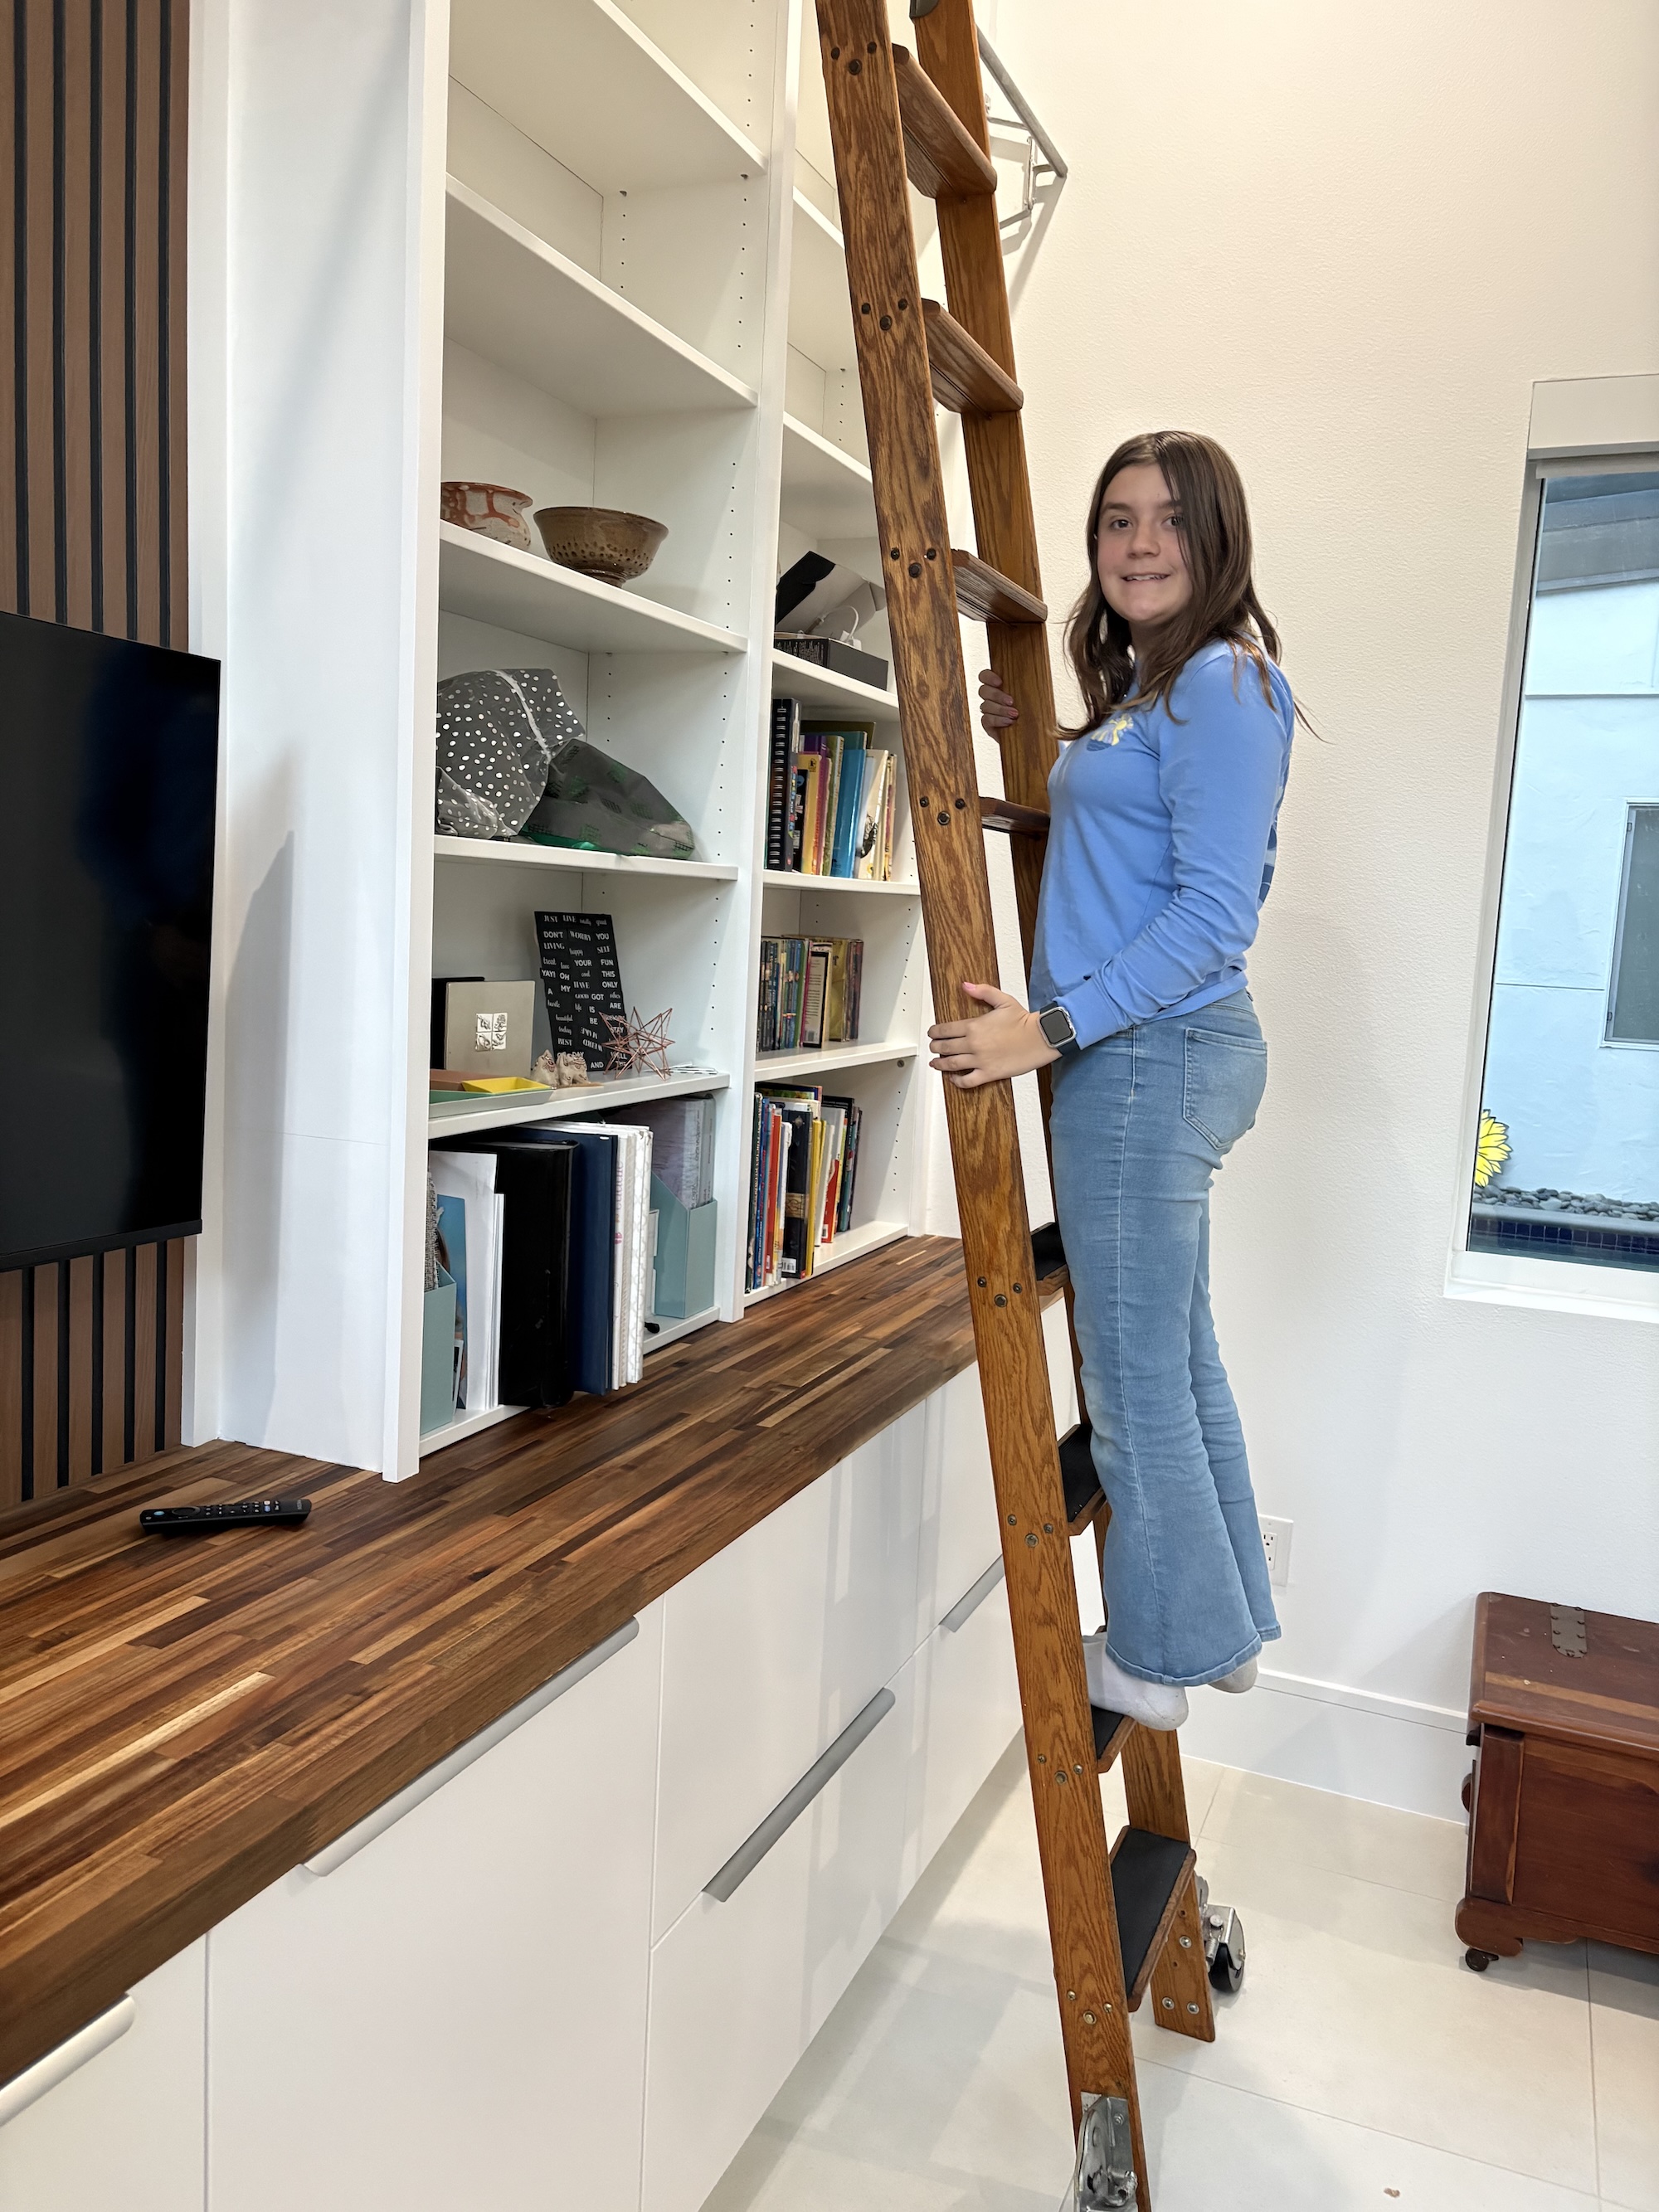
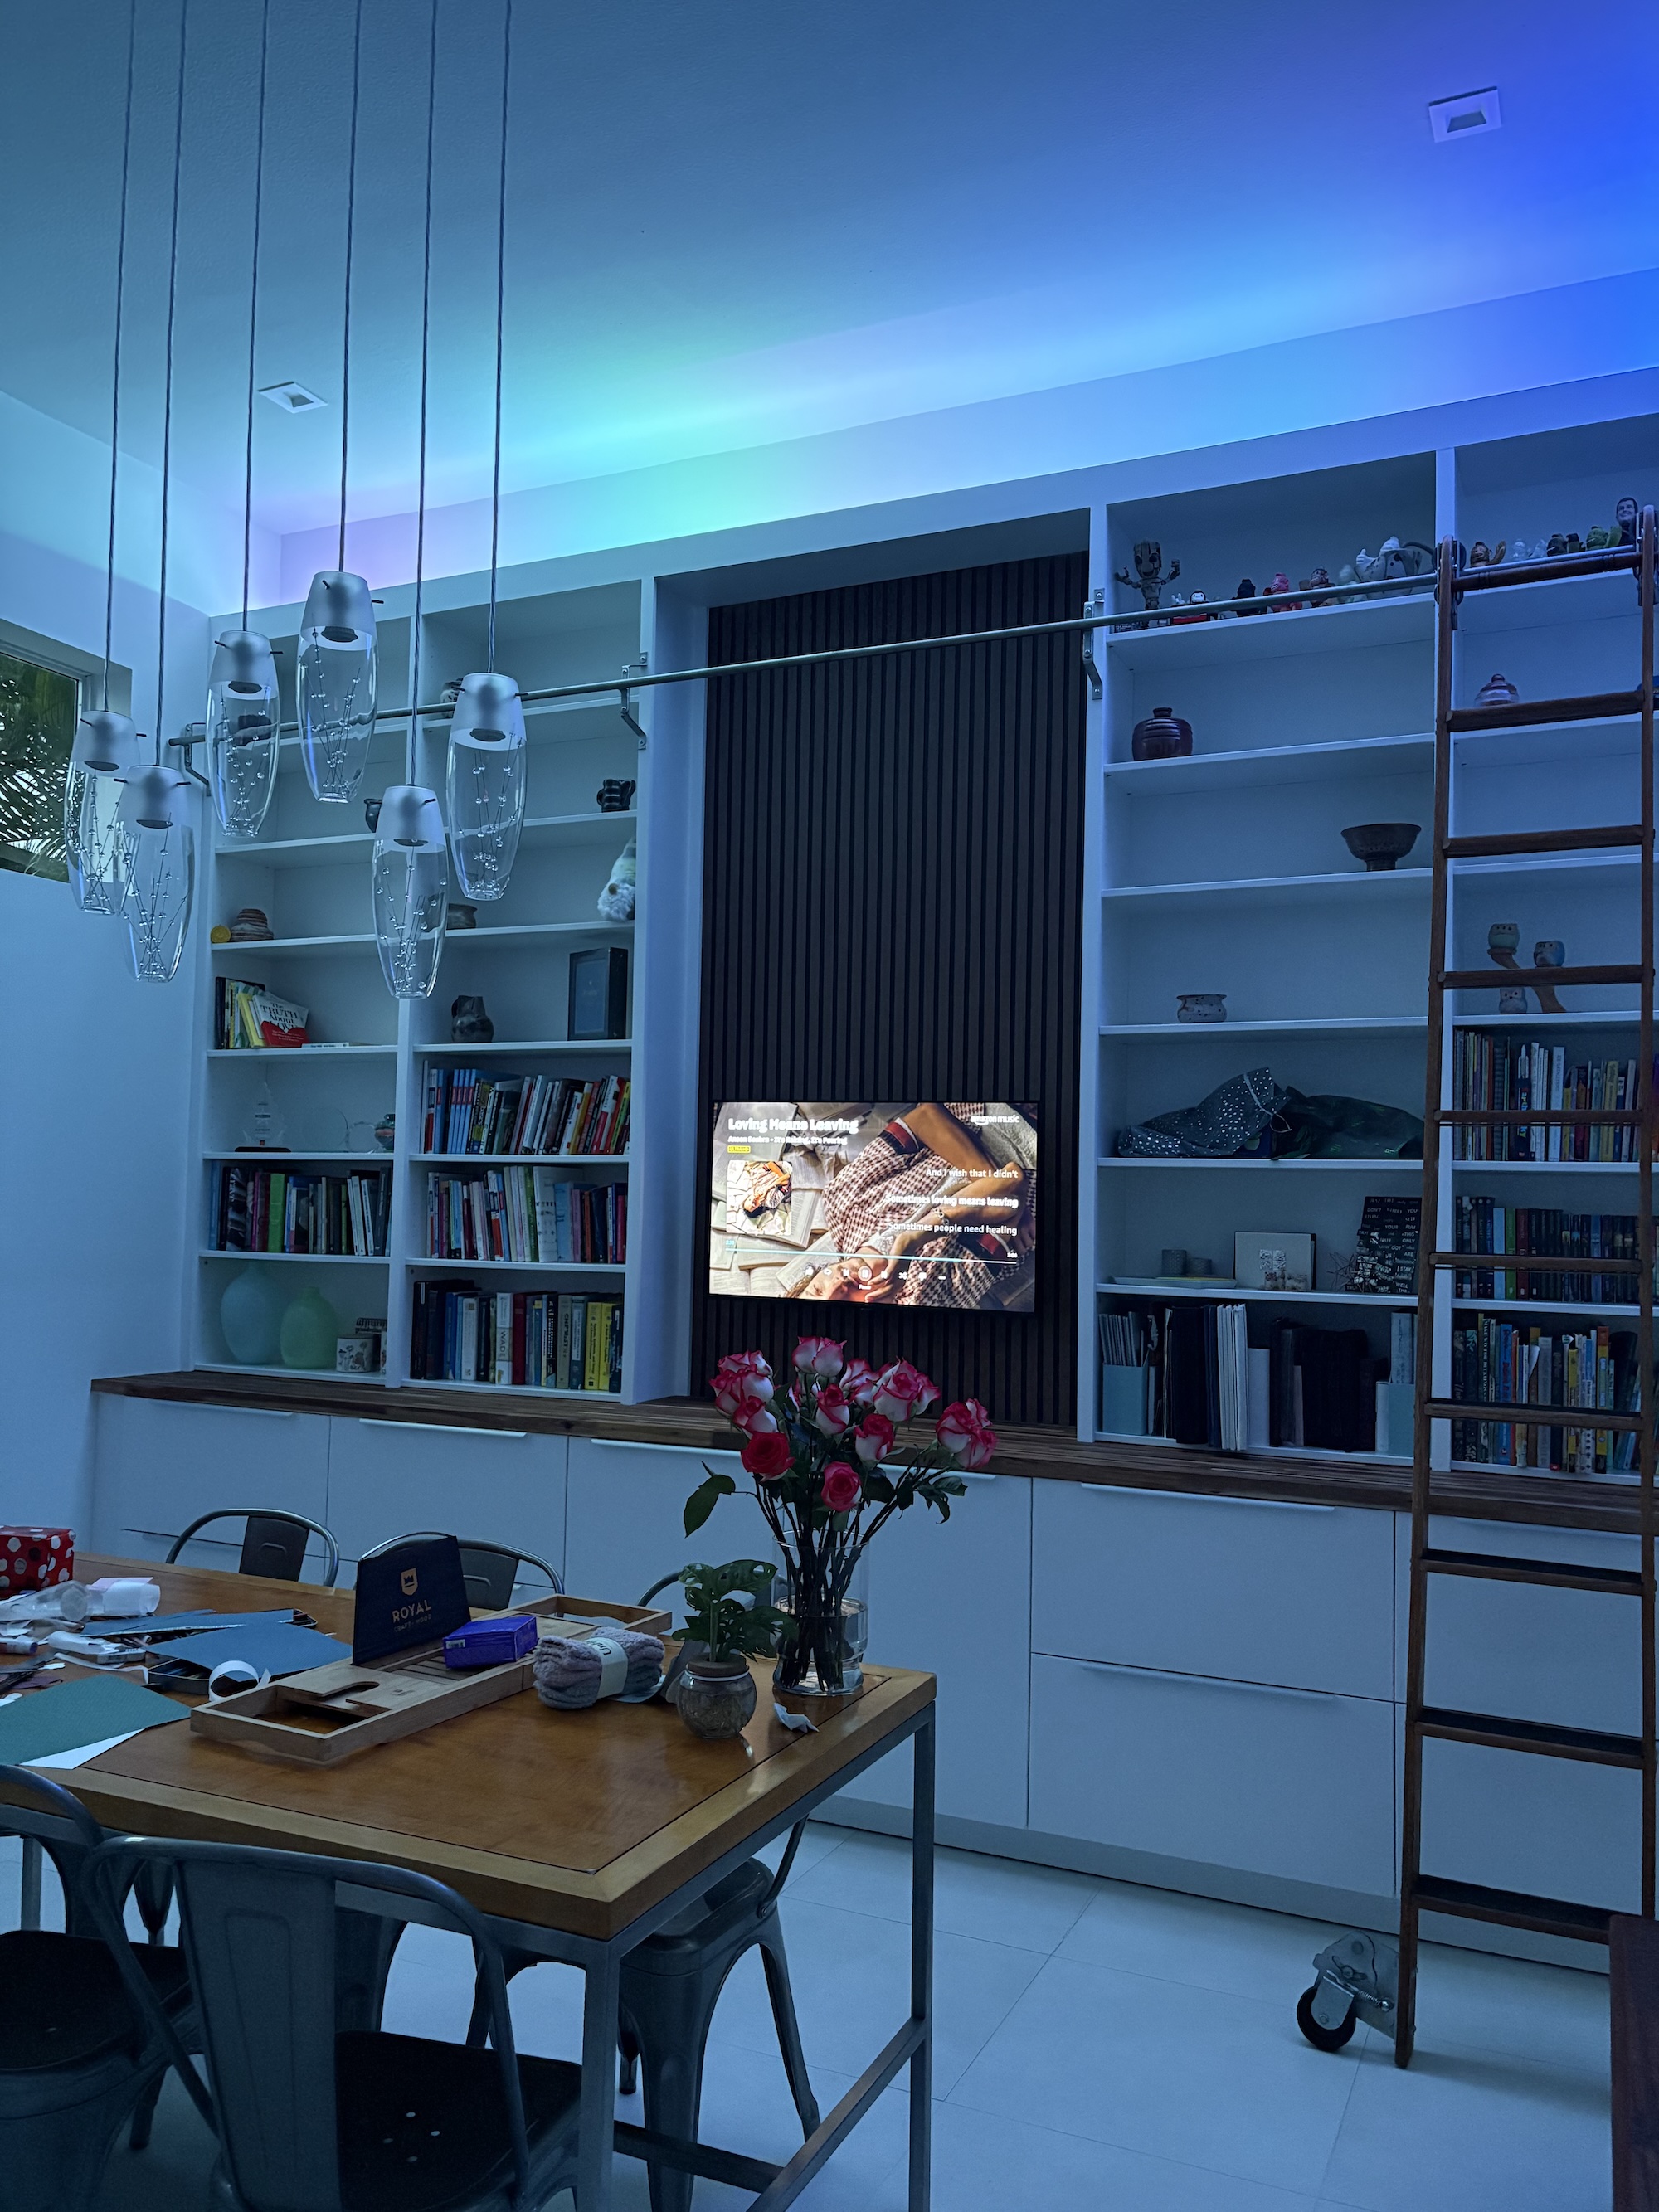
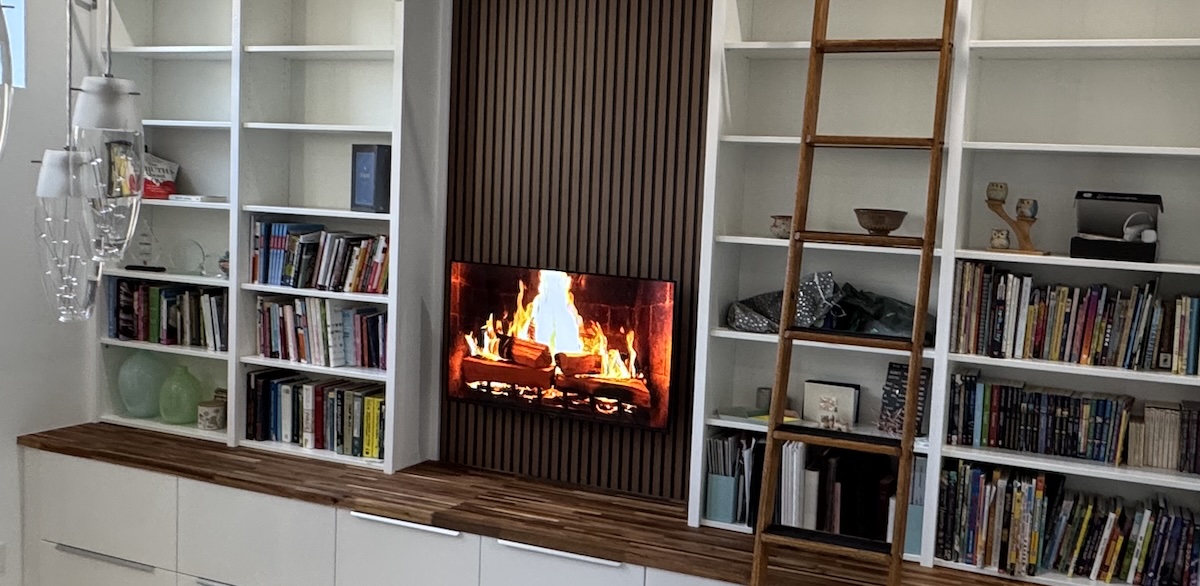
Once the ladder was attached to the track rollers, I used it instead of my folding ladder to finish the touch-up painting. We also securely attached the mount and TV to the wall and added a finishing touch to the top – a 32′ GE Cync Dynamic Effects Smart Light Strip, which looped perfectly around the header of the unit to add a colorful glow to the white room in the evenings. We still need to add more of our books and mementos to the shelves and figure out where things go in the base cabinets, but we’re really happy with how it turned out.
All in, our winter break project came in at just over $3k, with most of that going to the base cabinets. Like I did with our office shed from 2020, I put together a rough budget breakdown for our Library Ladder Wall project. I didn’t include the TV and wall mount which we had and I made a bunch of trips to Ace Hardware and Home Depot over the course of the project for minor things like screws, caulk, and a quart of paint that I’m missing here, but this most of it.
| Item | Cost |
|---|---|
| Vintage 1980 Putnam rolling library ladder | $100 |
| IKEA base cabinets | $2,079 |
| Acacia Butcher Block Countertop 8ft, 2 @ $199/ea | $400 |
| IKEA Billy bookcases with height extensions | $436 |
| 4′ x 8′ Natural Oak Decorative Slat Wall Panel | $50 |
| 1″x2″x8′ Trim Boards (vertical trim) 12 @ $4.93/ea | $59 |
| 1″x4″x12′ Trim Boards (top trim) 2 @ $14.78 | $30 |
| 12×72 Decorative Shelf (top filler shelf) | $22 |
| Howard Cutting Board Oil |
$10 |
| Howard Feed-N-Wax | $11 |
| GE Cync Dynamic Effects Smart Light Strip |
$19 |
| Total | $3,216 |
This looks incredible! Thanks for detailing all the steps it took to get there – this is very helpful. Great job!