This post was imported from a blog called Contemporation where Amy and I wrote about the renovation of our 80’s contemporary home in Atlanta. That blog is no more but I wanted the content to live on.
Well hello there, it’s been a while. How are you? Amy and I have been so busy keeping up with Adelyn lately that we haven’t done much contemporating. We did recently tear out our broken firebox and cut a cat tunnel into a closet but we never made time to post about those things. The silence is about to end soon as we’ve started to get bids for phase 2 of the Pulley House renovation.
In the mean time, I just finished a fun DIY furniture project courtesy of my friend and coworker, Alvaro. He and his wife Jessica are expecting their first child at the end of October. They’re working on getting their nursery together and one thing they were missing was a bookshelf. Jessica fell in love with Oeuf’s Mini Library but couldn’t justify the $678 price tag. After seeing the bookshelf, Amy fell in love with it too, so Alvaro and I decided to get together on a Saturday afternoon and build a couple Mini-Library-esque bookshelves. This was our inspiration:

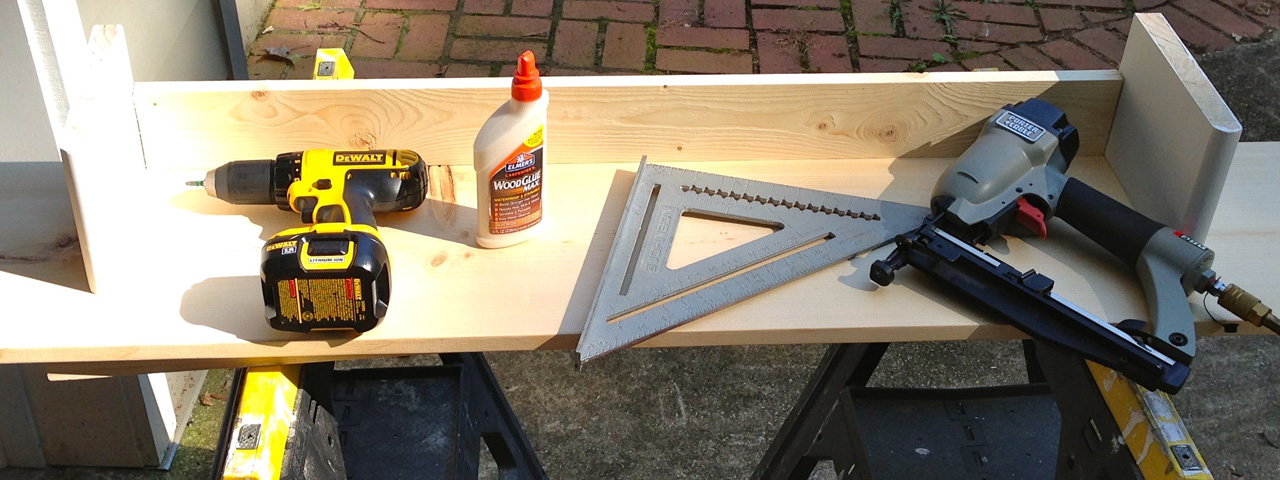
The first step was to figure out some general measurements and get our list of materials together. We chose 54 inches as our width and decided to use 10″ and 12″ deep Whitewood pine boards for the shelves. In the inspiration picture above, you can see that the risers have a rounded front on them. To avoid having to route a perfect bullnose, we chose basic pine stair treads to use as the risers. We also picked up some hardboard panels for the back of the boxes, 1/2″ plywood for the doors, some screws, adjustable legs and magnetic catches to hold the doors closed. We already had almost everything else we needed (matte varnish, white paint, wood glue and sandpaper) so our grand total for materials was just under $100 per bookcase.

That trip was on a Friday night, so first thing on Saturday morning, we started marking and cutting all the pieces. Here’s the list of cuts in case you’d like to follow along at home.
- 1 Bottom Shelf: 54″ wide from 1×12, 6ft pine board
- 3 Upper Shelves: 54″ wide from 1×10, 6ft pine board
- 1 Leg Stabilizer: 36″ wide from 1×4, 6ft pine board
- 2 Leg Risers: 6″ tall x 8 ½” deep from 4ft pine stair tread
- 3 Upper Risers: 9″ tall x 8 ½” deep from 4ft pine stair tread
- 5 Lower Risers: 12″ tall x 8 ½” deep from 4ft pine stair tread
- 1 Upper Door: 17 ½” wide x 8 ¾” tall from ½” plywood
- 1 Lower Door: 18 ½” wide x 11 ¾” tall from ½” plywood
- 1 Upper Back Panel: 19″ wide x 10″ tall from 1/8″ hardboard backer panel
- 1 Lower Back Panel: 20″ wide x 13″ tall from 1/8″ hardboard backer panel

To ensure each of the cuts were straight, we used a speed square as a guide for the circular saw. Once we had everything cut, we used a 1″ hole saw to make the hole pulls in the plywood doors.

Rather than having to make 4 holes with the hole saw, we clamped 2 doors together to make 2 holes at a time. After that, Alvaro started sanding and I started painting or varnishing each piece he finished sanding.

By the end of the day on Saturday, we had all of the pieces cut, sanded, painted and ready to start assembling. We were hoping to be a little further along but we decided to let all the pieces dry and start fresh on Sunday.

First thing on Sunday we installed the adjustable feet in the leg risers.

Next, we connected those leg pieces with a leg stabilizer board. After that, we flipped the assembly over and attached the bottom shelf with wood glue first, then with a few nails from a nail gun, and then screws. We want this thing to be really secure since babies climb on everything.

We were pretty happy to see that even at a low angle, you couldn’t see the stabilizer piece tucked under the bottom shelf.
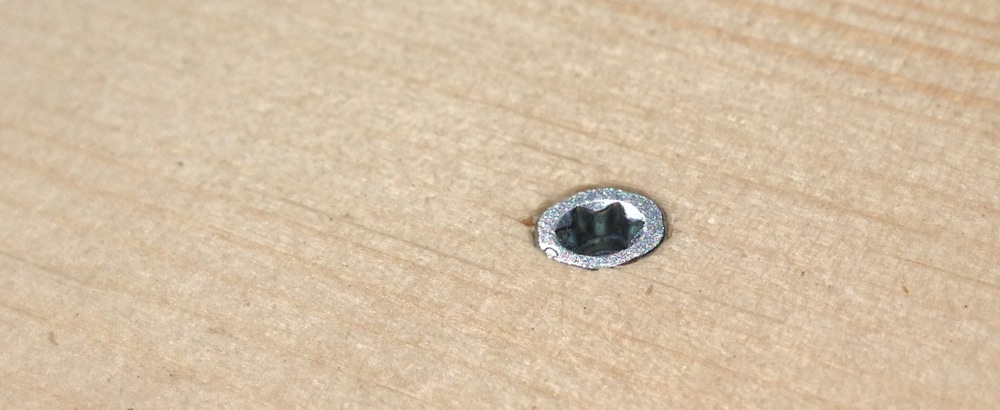
We were also happy to see that even though we chose to drill through the tops of the shelves, the screws we decided to use looked sleek. We originally wanted to conceal them, but they add an industrial element that wasn’t in the original piece.

After all the time we spent cutting and sanding, the assembly went pretty fast. And doing two at the same time made it much more efficient than if we’d built them separately.
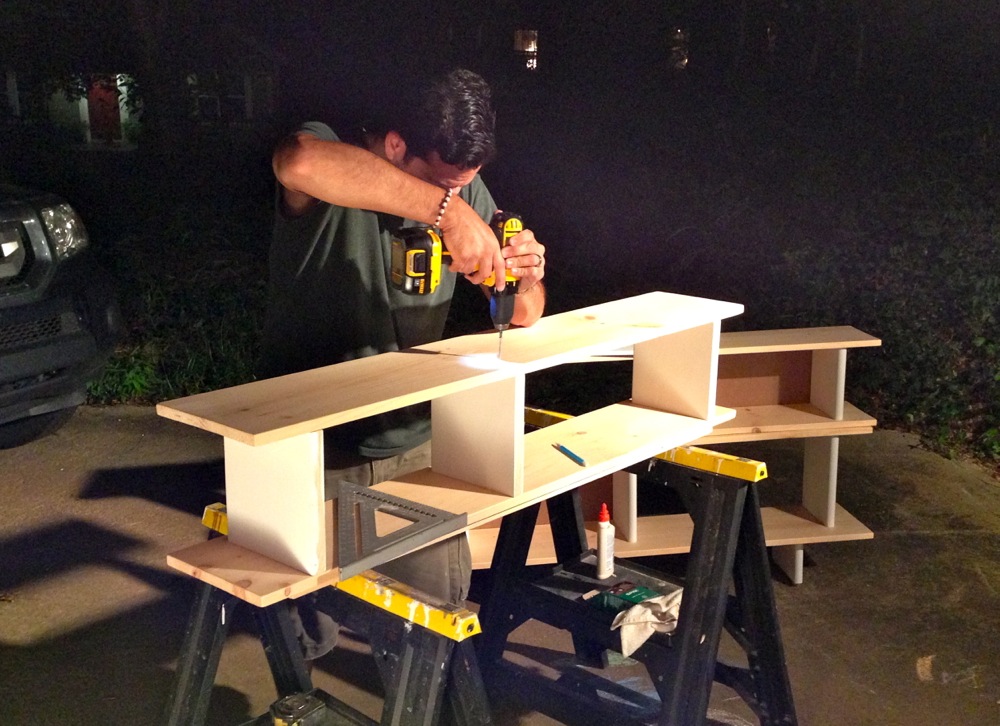
It was kinda late by the time we wrapped everything up, but we were proud of what we accomplished.

I would have never spent nearly $700 on a simple bookcase for a kids room but $100 and a weekend was well worth the reward.

We still have to hunt down the right type of inset hinges for the doors, but the bookcases turned out square, sturdy and beautiful. I think the most important thing to both Jessica and Amy is that we built something with our own hands for our kids.

They turned out so awesome! I can’t wait to line the back of the cabinets with a funky fabric or paper and set it up for the bean. Proud wife!
Tons of fun building these bookcases. I got the wood-working bug now. 🙂
[…] but apparently mustaches are “in” this year. Our friends Alvaro & Jessica (who we built bookshelves with recently) didn’t know that either when they picked the theme for their baby boys’ […]
I LOVE this bookshelf but also could not bring myself to pay that kind of money for it. My husband loves to build things but he is a beginner and i think this diy is perfect for us, thank you so much. i am curious as to what hinges you ended up finding though if you could let me know. 🙂
Thanks Hailee. We ended up deciding to leave the doors off and covering the back panel with contact paper. We may still attach the doors at some point. We had an inset European hinge like this in mind, but I’m not sure that the doors are thick enough for the cup hole: http://www.amazon.com/European-Cabinet-Concealed-Close-Inset/dp/B00LH4N0UK/
Thanks guys! This is exactly what I was looking for 😀 I literally just showed the $678 shelf to my husband and told him that we should build one. Using the stair risers was genius! Let us know what you found for the door hinges 😀 Good luck with your little ones!
Glad this post was helpful, Claire! The bookshelf is still serving us well and is currently covered in toys and books. I’ll ask Alvaro what hinges he ended up using but we decided to keep ours doorless to keep everything accessible.
Hey thanks for this!! I’ll be attempting this soon, do you have any details on the screws/parts you used?
Hi Mike, the screws that I used were Spax #8, 1 3/4″. There’s a Home Depot link in the article below the picture of the screw head with the details. I ended up ordering hinges for the 2 doors from Amazon:
https://www.amazon.com/gp/product/B003Z7VMOS
and picked up some magnetic cabinet door latches that were similar to this:
http://www.homedepot.com/p/Liberty-White-Heavy-Duty-Magnetic-Door-Catch-C080X0C-W-P/100149442
Best of luck!
I’m going to be building a similar shelf soon and came upon your blog while researching. Where did you get the adjustable feet? I know the stair treads are 3/4 in, but the only feet I’m able to find are 1 in or more and your look like the same width as the stair tread.
Hi Samantha, I’m excited to hear that you’re building a similar shelf. The pine stair treads we used were 1 inch thick and the feet we used were as well. I believe the feet were similar to these threaded glides from Home Depot. Please let me know how the project goes!
[…] validation or rebuttals. Sometimes though, the things I wrote got noticed. Maybe it was because the project was interesting, the problem was a common one, or perhaps I just made people laugh. Regardless, it was that […]
[…] also found a couple of examples online of people who had the exact same idea. The best tip I found was to use stair treads for the side […]