A couple of weeks ago I decided it was time to build something fun. My kids and I enjoy tinkering with maker projects here and there, but we haven’t made anything lately quite like our epic Twang LED Strip game build from last year. I really wanted another project that required some 3D printing and made use of an Arduino Uno and some Arduino starter kit parts we had sitting idle.
Post by @jasongraphixView on Threads
Looking around on Thingiverse, I found a little Simon game design that used an Uno and looked pretty fun. The instructions were in German, but it seemed simple enough after running it through Google Translate. Plus, the only parts I needed were some buttons and a basic switch.
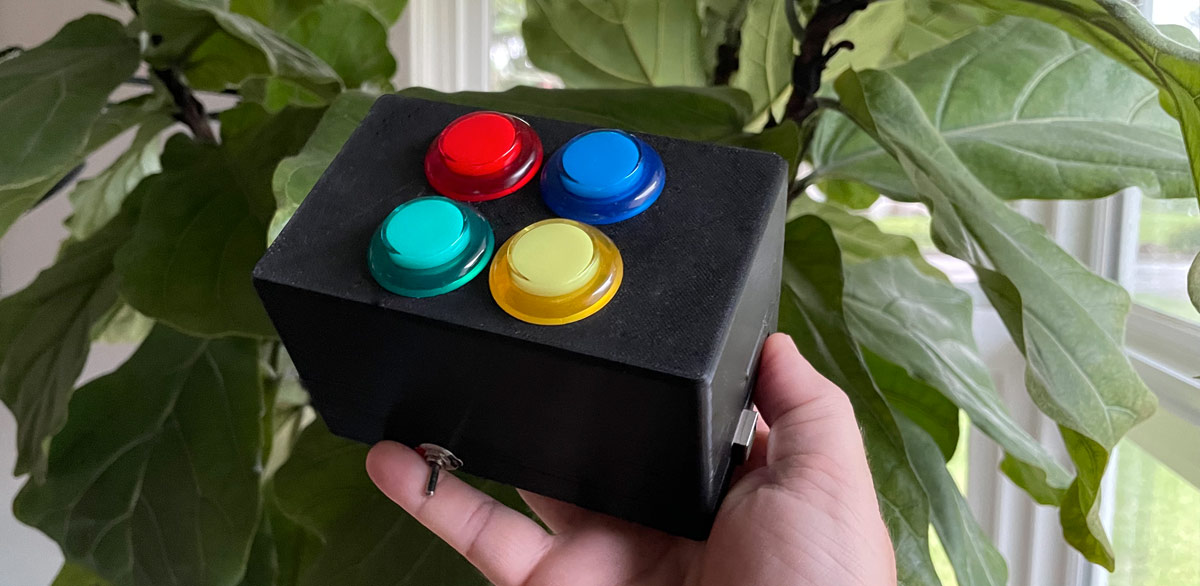
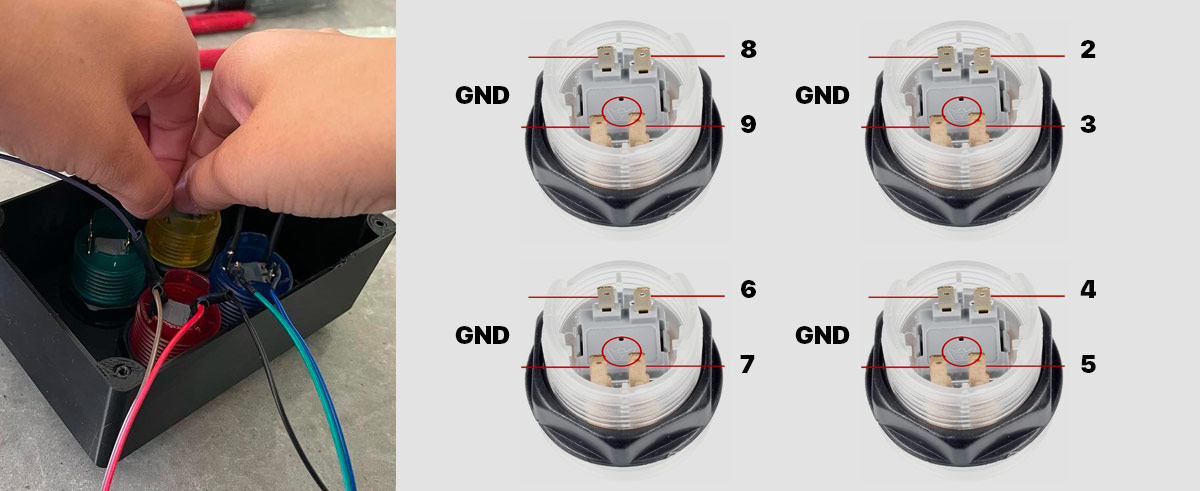
I immediately started 3D printing the case and ordered a set of LED Arcade Buttons on Amazon for ~$12. For the switch, I figured I’d just wire that in once we got the game working. The next weekend, I had Adelyn help me solder and heat shrink DuPont wires onto all 16 of the button terminals. I knew I was going to merge all the ground wires, but I decided to hook everything up with pins first to make sure it all worked before splicing things together.
Post by @jasongraphixView on Threads
With the button wires all soldered on, it only took a few minutes to plug the positive terminals into the board, pin in our starter kit buzzer and connect all of the button ground wires to the common GND pin with a breadboard. Because I followed the button connection pin numbers from the tutorial, I figured the Arduino Sketch might work, but it was actually a pleasant surprise when I uploaded the code and it was immediately playable! The only snag I ran into was that I couldn’t close the case. The threaded stem of the buttons are pretty long and the DuPont pin headers stick so far out of the top of the Arduino that I needed at least another half inch.
I modified and reprinted the base portion of the case to make the walls taller and was able to get all the wires inside. The design includes a 9V battery for portable power but I needed a toggle switch to turn the game on and off. I could have bought the switch on Amazon when I got the arcade buttons but it seemed like a great excuse to visit Skycraft Surplus here in Orlando. As I expected, they had a LOT of switch options and I bought a mini toggle with lead wires for just $2.
We’ve been enjoying the game and competing over who can repeat the longest sequences. You can buy the actual mini Simon game for less than what I paid for the buttons alone, but as someone who works on software all day, I love tinkering with physical hardware. My hope is that the kids stay excited about DIY projects, knowing that they can build anything themselves if they try.
[…] Building Simon for Arduino Uno (Jason Beaird) […]