This post was imported from a blog called Contemporation where Amy and I wrote about the renovation of our 80’s contemporary home in Atlanta. That blog is no more but I wanted the content to live on.
The process of getting our addition underway seems to be taking forever. We have our construction drawings, we’ve talked through the details with our general contractor and he’s starting to pull the permits necessary to get started. The actual ground breaking though is TBD. To be determined? To be decided? To be defined? How about TOTAL BATHROOM DEMOLITION?
It’s been an entire month now since I took out the little tile step on our upstairs tub and last weekend I was in the mood for some more demo. I took my box knife, hammer, prybar, reciprocating saw and shop-vac upstairs and went to town.
Amy suggested that I should start by getting the old fiberglass tub lifted out of it’s gray tile frame since that would have gone in last. To do that, I first cut through the ridiculously thick 2″ wedge of caulk that ran around the edges of the tub. Then I unscrewed the tub drain and remove the spout and shower handle. By the time Ames came up to check the progress, it looked like this:

Once I got the tub popped up, I could see what I already assumed, that this bathroom was a quick and dirty remodel job. It was obvious that they had some water issues with the previous (small tile) tub surround and reused as much of the existing structure as possible.

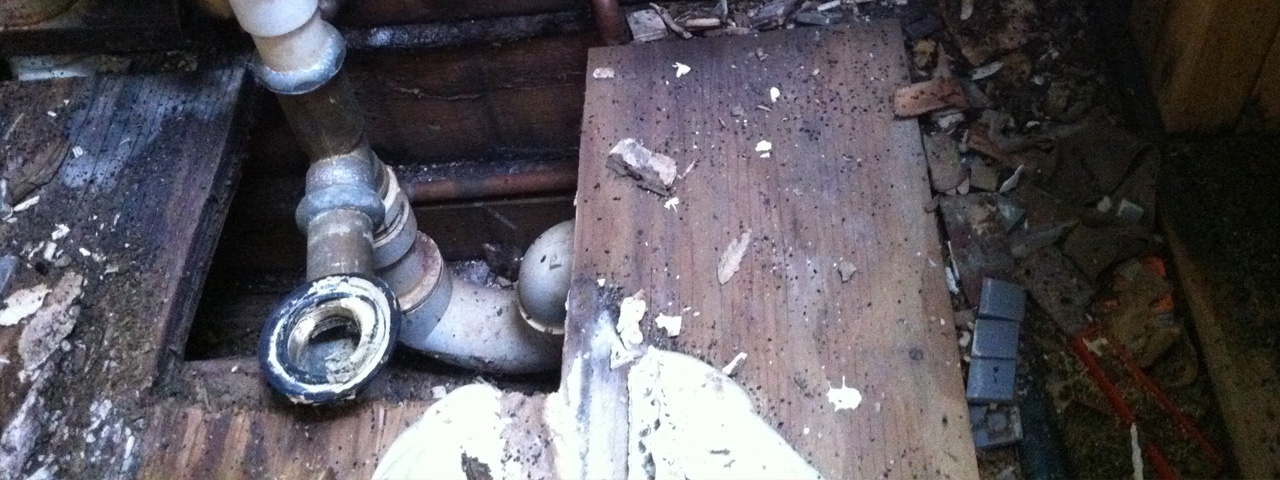
There was a lot of dirt and debris in the cavity where the tub was nested. Old tiles, broken grout, a putty knife, lots of insect droppings oh, and a few beer bottle caps.

As if the beer cap doesn’t say enough about the workmanship of this project, I also found a few tile spacers. Amy and I have done a few tile projects so far and have used spacers like this ourselves. According to my father-in-law though, who’s been laying tile his whole life, spacers are for DIY and amateur tile setters.

From the next picture, it looks like the original tub surround was a flat platform. That obviously wasn’t the wisest choice for preventing moisture issues. Well, the second time around, they added these awkward structural shelves to guide the water back into the tub.

I use the term “structural” loosely here, as they were very easy to remove. I didn’t want to get tile shards all over, so I came up with a plan to remove the tub frame in chunks. To do this I hammered off a single row of tile and then used my reciprocating saw to cut the wood wall vertically down to the floor.

As I started to chisel off the row of tile on the shower-head side of the tub – surprise! Lots of rotten wood. Oh well, It made the demo a lot easier.

After cutting both sides of that front wall, it was fairly easy to pry the whole thing off the bottom framing plate. It was much harder to pick it up and carry it down from the 3rd floor.

I continued cutting away chunks of tile and 2×4 and carrying them downstairs until the whole tub frame was gone. Good riddance!

The one thing I couldn’t carry downstairs was the fiberglass tub itself. It weighs less than that front wall chunk, but it’s too big to fit through the bathroom pocket door. I could tie a rope through the drain hole and lower it down through the “pulley shaft“. That’s obviously how they got it up there but I think we’ll take it out a different way. We’ll be cutting a hole through the wall where the toilet is now into the new master bedroom, so it’ll be much easier to take it out that way.

In the mean time, I covered the old drain hole with some scrap wood to keep our cat from getting down there and moved her litter box to the new dirtiest spot in the house. Here’s hoping the addition gets started soon. Otherwise, I might just keep demoing parts of the house we’re still using.
Wow, that’s a nice little treasure you found there. I bet if feels good to get that rotten wood and poorly built mess out of the house.